|
 During spring here in the mountains of Utah it can be thirty degrees and snowing on one day and fifty degrees and sunny and breezy on the next. The unpredictable spring is followed by a relatively short growing season followed by an unpredictable fall. During spring here in the mountains of Utah it can be thirty degrees and snowing on one day and fifty degrees and sunny and breezy on the next. The unpredictable spring is followed by a relatively short growing season followed by an unpredictable fall.
The window to get the garden tilled and ready for planting is often narrow so it makes sense to have the roto-tiller ready to go when the weather and ground is ready. The following tips are generally written toward getting the tiller out of storage for spring chores. However, most of these routine maintenance steps can be done in the fall. And it's probably best to do them in the fall. As a minimum, the fuel should be drained or treated with a fuel stabilizer such as Sta-Bil.
In general servicing a tiller is much the same regardless of brand, the exception being the small cultivators like the Mantis™. Whether front tine, mid-tine or rear tine all tillers require very similar routine maintenance. These tips are designed to take you step by step through the maintenance procedure. This page will not provide in depth help on repairs. If these tips differ in any way from the instructions given by the manufacturer of your machine, always follow the manufacturer's guidance.
Before actually starting the maintenance it is a good practice to check and see what parts are needed. I have made two lists: one for routine maintenance and the second for possible replacement of worn parts. Purchase the required parts prior to starting the routine maintenance. If you are going to purchase engine parts, record the engine model, type, and serial number. This information is found on the recoil or fan housing. Honda™ engine numbers are cast or stamped into the aluminum engine block. If purchasing tiller parts record the model and serial numbers that are usually found on the tiller frame. Engine Service
-
Disconnect the spark plug wire. (Make sure the wire memory doesn't cause the wire to contact the spark plug connector.)
-
In the next couple of steps we will be draining the old fuel (gasoline). If you stabilized the fuel or ran the engine dry before storing for the winter skip to step nine.
-
Even stale fuel when mixed with the oxygen in the air can result in an explosive mixture. Drain the fuel outside or in an open garage or shed where there are no sources of ignition. You can drain the fuel by carefully removing the fuel line at the fuel tank or carburetor. Allow the fuel to drain into a suitable container. Any spilled fuel should be wiped up or absorbed with oil dry or kitty litter. You can also siphon the fuel from the tank, however draining removes the fuel more completely. Dispose of the fuel by appropriate environmentally-conscious methods.
-
Once the fuel is drained, reattach the fuel hose and install any hose clamps removed.
-
If the hose is hard and or brittle it should be replaced. It is normally 1/4 inch (ID) hose and can be purchased at any auto parts store. Make sure you use hose designed for gasoline.
-
The remaining fuel in the carburetor should now be drained. If the tiller uses a Tecumseh™ engine it quite likely will have a spring loaded drain on the carburetor float bowl. If it does simply hold a rag or paper towel under the bowl while depressing the drain. This will remove any remaining fuel. Dispose of the rag/paper towel appropriately. If the tiller has a Honda™ engine there will be a small screw or bolt in the lower side of the bowl that can be removed to drain the fuel. Don't remove the the bolt in the center on the bottom of the bowl. This holds the bowl to the carburetor. On tillers that have Briggs and Stratton™, Kohler™ or Tecumseh™ engines that don't have a drain valve or plug carefully loosen the float bowl bolt (sometimes called a nut) that is located in the center of the bottom of the bowl. Loosen it one turn or less until the fuel drains from the the carburetor. (Do not completely remove bolt.) Now retighten the bolt. The fuel draining process is now complete.
-
If the engine is equipped with an in-line fuel filter it should be replaced. Remove the hose clamps, if they are present, and remove the filter. Install the new filter and clamps. Note the direction of the fuel flow in the old filter and install the new filter accordingly. Skip to Air Filter Service.
-
If you stabilized the fuel and did not drain it, clamp the hose closed from the fuel tank with a pair of locking pliers, being careful not to damage the hose, then replace the filter. Removing the old filter will allow a small amount of gasoline to escape. Wipe this up.
-
If the hose is hard and or brittle it should be replaced. It is normally 1/4 inch (ID) hose and can be purchased at any auto parts store. Make sure you use hose designed for gasoline.
Tillers usually operate in dusty conditions. Dirt ingestion is the number one cause of premature small engine failure, hence the air filtration system is paramount in protecting the engine.
-
Most tiller engines have a two stage air filter; a foam "wrap" around or in front of a pleated paper filter. There are variations, however and some engines will have just a foam filter element and some just a paper filter. Wipe any dirt from around the filter cover and remove. The filter cover is usually held in place with a wing nut or two screws.
-
Remove the filter assembly. Once again the filter may be held in place with a wing nut. Be careful not to let any dirt fall into the carburetor throat.
-
Inspect both the foam "wrap" or pre-filter and filter. If either are significantly soiled they should be replaced.
-
The paper air filter cannot be effectively cleaned and if soiled should be replaced.
-
The foam pre-filter can be cleaned by washing in soap and water, thoroughly dried and re-oiled. A clean or new foam pre-filter should be oiled. Oil the filter by placing in a plastic bag, adding a tablespoon or two of clean motor oil and squeezing the oil into the filter. Remove the filter and blot the excess oil with paper towels. If the foam element contains too much oil it will transfer to the paper element and plug it so air can not pass through. If the foam element is stretched and doesn't fit tight around the paper element it will not serve its function and should be replaced. (Some brands of foam filters are not oiled and this is usually stated right on the filter.)
-
Reassemble the air filter and pre-filter and attach to the carburetor, and install the cover.
Spark Plug Service
-
Using the correct-size spark plug wrench or socket remove the spark plug. (The plug wire was removed earlier)
-
It is best to replace the plug with the correct part number for the engine being serviced. It is possible to clean and reset the gap on the original spark plug, however for the nominal cost of a new plug it is best to replace it. The spark plug you remove may not be the correct part number. It may be that the existing spark plug part number is wrong, either because it was incorrectly selected or the part number has been
superseded. Take the engine model and type to a auto parts dealer or small engine shop to obtain the correct replacement.
-
Spark plugs come with the correct gap. (the distance between the center electrode and the ground electrode). However it doesn't hurt to double check the gap. Ask the person selling the plug for the correct gap. It will be in the parts catalog that they used to look up the spark plug part number. After checking the gap attach the plug wire and lay the plug on the top of the engine so the base of the plug is grounded or in contact with the engine.
-
Double check to make sure that there isn't any gasoline on the engine. A spark could ignite the fuel and cause a flash fire in the following step.
-
Turn the ignition on either by turning the engine switch to the run position or moving the throttle up away from the stop position. Now pull the engine over rapidly with the starter recoil while observing the plug gap. A white or blue spark should jump across the gap. This indicates that the ignition system is working. This is not a comprehensive test of the ignition system. However without the availability of the diagnostic tester it should suffice. Now wipe a small amount of oil or anti-seize compound on the threads of the spark plug and install. Tighten with a socket or plug wrench.
Tiller Unit Service
-
Most tillers use a belt or belts to transfer the engine power to the tiller. Check the condition of the belts looking for cracks or glazing of the "v" surfaces. Also look for any areas where chunks may be missing. Replace the belts if you see any of these conditions. On some tillers there are two matched belts. These have to be replaced as a matched set.
-
In most cases the belt is used as a clutch. Check to see that it is sufficiently loose in the disengaged position so it will slip and sufficiently tight in the engaged position to drive the transmission. If it necessary to adjust the belt tension consult your owners manual. If you find that the belt can't be tensioned sufficiently in the engaged position then the belt is stretched and must be replaced.
-
 Some Troy-Bilt™ models use two belts, one for forward and one for reverse. Both need to be checked and adjusted. Some models use a rubber or fiber disc for reverse. These should also be checked for wear and adjusted. In all cases drive in reverse should be facilitated only while the operator holds the shifter in reverse. A unit that propels in reverse without the operator present is unsafe. The transmission lubricant on Troy-Bilt™ tillers should also be checked. Check your owners manual for the correct lubricant. (Use SAE 85-90 gear oil if there is no owners manual available.) On most models there is a fill plug on the top of the transmission. The plug may incorporate a dipstick and the oil level can be checked in this manner. If the plug does not serve as a dipstick, then there is a plug on the side of the transmission case. Remove this plug. The oil should be at the bottom of the hole. If the oil level is low add until it starts to run out of the side plug hole. Reinstall the side and top fill plugs. Some Troy-Bilt™ models use two belts, one for forward and one for reverse. Both need to be checked and adjusted. Some models use a rubber or fiber disc for reverse. These should also be checked for wear and adjusted. In all cases drive in reverse should be facilitated only while the operator holds the shifter in reverse. A unit that propels in reverse without the operator present is unsafe. The transmission lubricant on Troy-Bilt™ tillers should also be checked. Check your owners manual for the correct lubricant. (Use SAE 85-90 gear oil if there is no owners manual available.) On most models there is a fill plug on the top of the transmission. The plug may incorporate a dipstick and the oil level can be checked in this manner. If the plug does not serve as a dipstick, then there is a plug on the side of the transmission case. Remove this plug. The oil should be at the bottom of the hole. If the oil level is low add until it starts to run out of the side plug hole. Reinstall the side and top fill plugs.
-
Several different chain drives have been used over the years by various manufacturers. The chain and sprockets that are enclosed in a simple cover should be cleaned with compressed air or a wire brush. Lubricate with chain lube. The chain lubricant comes in an aerosol can that can be purchased at an auto parts store. It sprays on wet, but dries as a dry coating. Lubricating the chain with grease or oil will cause dirt to stick to the chain and shorten its life.
-
Check the chain for the proper tension. It should not have excessive slack. If it cannot be tightened sufficiently to remove all of the slack it should be replaced. When replacing the chain check the sprockets for wear. Sharp teeth on the sprockets indicate excessive wear and they should be replaced.
-
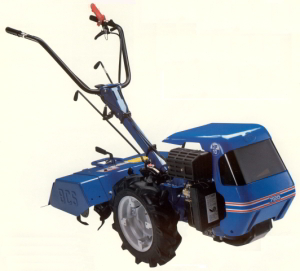
 Some tillers such as BCS™ use a geared driveline. These tillers in general use an automotive-type clutch (no belts or chains). The clutch is adjusted by changing the length of the clutch cable. Any other service to the clutch is best left to the professional technician. The transmission oil on the BCS™ tiller should also be checked by removing the transmission fill plug that also serves as a dip stick. If the oil is below the add level fill to the full mark on the dip stick. It is prudent to check the owners manual for servicing the transmission. If you do not have an owners manual and need to add lubricant check with a BCS™ dealer. If both of these sources of information are not available a good choice is SAE 85-90 grade GL5 gear lubricant. Some tillers such as BCS™ use a geared driveline. These tillers in general use an automotive-type clutch (no belts or chains). The clutch is adjusted by changing the length of the clutch cable. Any other service to the clutch is best left to the professional technician. The transmission oil on the BCS™ tiller should also be checked by removing the transmission fill plug that also serves as a dip stick. If the oil is below the add level fill to the full mark on the dip stick. It is prudent to check the owners manual for servicing the transmission. If you do not have an owners manual and need to add lubricant check with a BCS™ dealer. If both of these sources of information are not available a good choice is SAE 85-90 grade GL5 gear lubricant.
-
Check the condition of the tines. If the ends come to a point it usually means that the tines are worn and should be replaced. Check the bolts securing the tines to the shaft. Replace any missing or broken bolts. Tighten any loose bolts.
-
Examine the tine shaft and axle shaft bushings and seals. Dirt and materials that get wrapped around the shafts can damage the seals. Remove any vines, roots or string that are wrapped around the shafts and check for oil leaks. If there is a significant amount of oil then the seals are worn and must be replaced.
Final Checks
-
Tillers do a lot of shakin' and things can get loose. Check every nut and bolt and tighten to manufacturer's specifications as required.
-
If the tiller has pneumatic tires check the tire pressures and set to 15-18 PSI or as indicated in your owner's manual.
-
Examine the starter rope for wear. If the rope is becoming frayed, replace it. This usually requires removal of the flywheel cover.
-
Examine the throttle cable and other cables for wear and function. If damaged or if they do not move freely, replace.
Starting and Testing
-
Check the engine oil and add enough oil if necessary to bring the level in the safe or operating range.
-
Add fresh fuel to the tank. Fill to about one-quarter full. Let the unit stand for five minutes or so and check for any fuel leaks. Even a small fuel leak is dangerous and must be corrected. If no leaks are visible then the unit can be started.
-
Set the throttle to one-half, turn the ignition on and set the choke to full on (or follow the manufacturer's instruction for starting).
-
Pull the engine over until it fires and starts. If after several attempts the engine fails to start it may be necessary to encourage the engine with a short burst of starting fluid. Remove the air filter housing. Inject a short burst of starting fluid (WD40 also works) into the carburetor throat. Reinstall the air filter and repeat the starting procedure. In stubborn cases the starting fluid procedure may have to be repeated. If the engine won't start at this point it will necessary to get professional help.
-
Run the engine at various throttle settings. Engage the tine drive and wheel drive and check the operation. Check any safety devices and ensure they function. Allow the engine to come to operating temperature.
-
Shut the engine off. Position a pan under the oil drain plug and drain the oil. Allow it to drain until it only drips every couple of seconds. Install the drain plug and tighten.
-
Add oil to the engine so that the proper level is reached. If the engine is going to be operated at temperature below forty degrees Fahrenheit, use SAE 10-30 motor oil. If the engine is going to be operated above forty degrees use SAE 30. Honda™ engines normally use SAE 10-30 year around. It is always wise to check your owners manual for oil recommendations.
-
Start the engine and run for a couple of minutes. Stop the engine, let stand for several minutes and recheck the oil. Add if necessary to bring to the full mark on the dip stick.
-
The routine maintenance is complete and the tiller is ready for service.
Back to Ol' Buffalo Gardening Page
|