Contrary to what one hears in the news media and the claims made by certain politicians and radical groups, shooting is one of the safest sports -- when practiced by persons of sound judgment in accordance with basic rules of safety. Handloading is a safe and natural extension of that sport.
If any information in this document conflicts with information given in your handloading manual or the instructions your received with your handloading equipment, always follow those instructions -- not mine.
The wisest approach to getting started in handloading is to learn from an experienced handloader who has no bad habits. The best mentor is an NRA Certified Reloading Instructor. If there isn't an NRA instructor in your area, talk to your local gun club or a good sporting goods store for a referral to an experienced handloader.
Handloading should be approached with the same degree of caution as an experimental science. Each handloader assumes the responsibility of safe reloading practices and accepts the risk for failure to apply good judgment and knowledge. Failure to apply proper safety precautions in this endeavor could result in injury, death, or damage to the shooter, handloader, bystanders, facilities, or equipment. The author of this webpage is not responsible for negative consequences of using or misusing information posted here. I recommend that handloaders always begin load development only by reference to a reputable reloading manual.
General safety:
Read the instruction manual for each piece of equipment you use. Keep it handy for later reference.
Understand what you are doing and why it must be done in a specific way.
Stay alert when handloading. Don't handload when distracted, disturbed or tired.
Never handload when under the influence of alcohol or drugs (legal or illegal).
Never smoke while handloading or near combustibles and explosives.
Always wear safety glasses while handloading.
Set up a well-organized, clean, well-lit work area.
Set up a loading procedure and follow it. Don't vary your sequence of operations.
Set up your handloading bench where powder and primers will not be exposed to heat, sparks or flame.
Keep everything locked up and out of the reach of small children.
Keep your handloading bench clean and uncluttered. Label components and handloads for easy identification.
Do not eat while handling lead.
Never try to dislodge a loaded cartridge that has become stuck in the chamber by impacting it with a cleaning rod. Have a competent gunsmith remove the round.
Follow loading recommendations exactly.
Don't substitute components for those listed in your manual.
Start loading with the minimum powder charge given for your cartridge.
Never exceed manufacturers' handloading data. Excess pressures caused by excessive loads could severely damage a firearm and cause serious injury or death.
When using an inertial bullet puller, use short, light taps instead of a single heavy blow.
Never attempt to disassemble a cartridge unless you are absolutely sure the bullet non-explosive or non-incendiary.
Gunpowder Safety:
Modern ammunition uses smokeless powder to propel the bullet down the barrel. It burns with much greater energy and pressure than blackpowder. Therefore, never use smokeless powder in a firearm designed for blackpowder.
Specific powders are designed for specific uses. Don't use them for other purposes.
Never mix smokeless powder and blackpowder.
Never mix blackpowder and blackpowder substitute such as Pyrodex®.
Never mix different brands or types of powder.
Never use an unknown gunpowder.
Pour out only enough powder for the immediate work.
Start new loads at 10% under maximum and increase slowly.
If you throw or measure powder charges by volume, check-weigh the charges every time you begin loading, occasionally during loading and when you finish. Weigh the powder charge in at least 10% of your loads to make sure you are dropping the proper amount of powder.
After charging cases with powder, check each and every case before seating a bullet. Look for the proper amount of powder and also ensure that there actually is powder in every case. The best method to do this is to use a loading block so that all cases are together and all can be visually compared to ensure that they contain the same amount of powder. A double charge of a fast burning pistol powder may not fully fill the case, so look carefully!
Have only one kind of powder on the loading bench at a time.
Empty the powder measure back into the original powder container when through with a handloading session.
Wash your hands thoroughly after handling powder.
Store powders only in original package. Don't repackage.
Keep powder containers tightly closed when not in use.
Clean up spilled powder with brush and dust pan; do not use a vacuum cleaner because fire or explosion may result.
Store powder in cool, dry place.
Store and keep primers and powder separately.
Smokeless powder is extremely flammable. Dispose of deteriorated powders according to recommendations in The Properties and Storage of Smokeless Powder SAAMI Reprint #376-2500, which is published in some handloading guides or available from NRMA.
Primer safety:
Priming materials differ in brisance (initial explosive force) and in the amount of hot gas produced. Don't mix primers of different makes.
Don't decap live primers. Fire them in the appropriate gun then decap.
Don't ream out or enlarge the flash hole in primer pockets. This can increase chamber pressure.
Over-ignition creates higher gun pressures. The best results are obtained by using the mildest primer consistent with good ignition.
Never use magnum primers unless called for.
Never use pistol primers in rifle cartridges. The pistol primer cup is thinner and can't take the pressures of rifle loads.
Don't use primers you can't identify. Ask your local police or fire department to dispose of unidentifiable or unserviceable primers.
Keep primers in the original packaging until used. Don't store in your primer feed tube or primer tray. Return unused primers to the factory package. Don't dump together and store in bulk. There is a risk of mass detonation if one is ignited.
Open only one package of primers at a time.
Never attempt to seat, or reseat, a primer in a loaded round.
If you accidentally seat a primer upside down, spray the exposed primer with WD-40 or other light oil then discard the case. If you need to save the case, let the oil soak into the primer for at least an hour, then inset the case in a neck sizing die with the sizing button removed. Wrap several towels around the die in case it detonates, then slowly ease it out with your reloading press.
Do not force primers. If you feel resistance to seating or feeding of primers, stop and investigate.
Store primers in a cool, dry place. High temperature, such as in a summer attic, causes them to deteriorate.
Store and keep primers and powder separately.
Don't handle primers with oily or greasy hands. Oil contamination can affect ignitability.
Clean the machines after each use. There have been instances of "primer dusting" in the tubes of loading tools because of vibration.
Lead safety:
Lead is known to cause birth defects, reproductive harm and other serious physical injury. It must be handled with extreme care.
Never eat, drink, or smoke when handling lead.
Handle lead bullets or lead shot only in a well ventilated area.
Always wash hands after handling lead and before eating.
Molten lead is hot -- 650-750 degrees Fahrenheit. This is no activity for children -- not even to watch!
Hot lead on skin takes a long time to cool -- severe burns will invariably result.
Wear eye protection and heavy clothing including leather gloves, a heavy apron, heavy jeans, and high-top leather boots. Welding supply stores sell clothing that will provide good protection at affordable prices.
Never drop ingots or culled bullets into molten lead. The splash is extremely dangerous. Instead, slip that ingot into the molten lead with tongs.
Molten lead gives off dangerous lead fumes. The smoke and fumes from fluxing also caries dangerous lead fumes. Always melt lead in a very well ventilated area.
Never heat lead to more than 900 degrees Fahrenheit. Doing so is completely unnecessary and will create significantly more dangerous fumes.
The melting pot must have a steady base -- a lap full of hot lead would surely take all the fun out of casting and handloading.
Never discharge firearms in poorly ventilated areas.
Handloading rifle & pistol cartridges
Never start with a maximum load. Start with the minimum powder charge and work up in small increments to no more than the maximum listed in your reloading manual watching for indications of excessive pressure.
If you are using a single stage press, do each step to the lot you are reloading before moving on to the next step.
Examine cases before loading. Discard any that are not in good condition.
Label boxes of loaded cartridges. Identify caliber, primer, powder and charge, bullet and weight, and date of handloading.
Seating depth of the bullet is extremely important in handgun loads. Handgun powders must burn very quickly because of the short barrel. They are sensitive to small changes in crimp, bullet hardness, bullet diameter, primer brisance and especially to bullet seating depth.
Check the overall length of the cartridge to be sure the bullet is seated properly.
Accumulation of lead or grease in the bullet seating tool may force the bullet in too far.
If the bullet isn't seated deeply enough, it may engage the lands of the barrel when loaded. This will increase the chamber pressure.
If you cast your own bullets, remember their hardness, diameter and lubrication affect the ballistics.
Plastic cases designed for practice loads (where the bullet is propelled by primer gas only) can't be used for full powder loads.
Prevent missing & double charges
It is easy to double charge if you are momentarily distracted. Use a depth gauge to check powder height in a shell. A piece of doweling rod can be used as a depth gauge.
Observe the powder level of cases placed in the loading tray. This is a way to discover any cases with missing or double powder charges.
Take care to operate progressive loaders as the manufacturer recommends. Don't back up the turret or jiggle the handle. Don't use a shell to catch the residue when cleaning out the powder train.
Like most other hobbies, handloading has its own "language". Here are some terms you need to be familiar with. See your handloading manual for more handloading information.
Anneal - The process of altering the structure of metal so as to relieve it's working stresses, prevent brittleness, and increase it's ductility. Only the case neck is annealed.
Antimony - A metal which increases the hardness of lead when combined as an alloy.
Anvil - A metallic part of the primer. The blow from the firing pin crushes the priming mixture against the anvil causing ignition.
Ball - In military nomenclature this term refers to the bullet.
Ball Powder - This is a trade name for a double-base smokeless powder developed by Olin Industries. The grains have a spherical, or flattened spherical shape.
Ballistics - The science of projectiles in motion.
Ballistic coefficient - Ratio of the sectional density of a bullet to its coefficient of form. Represents the projectiles ability to overcome air resistance in flight.
Battery cup - A type of primer used in shotshells which makes use of an outside cup to support it in the case.
Bearing surface - That portion of the bullet surface which bears on, or touches, the bore.
Bell - To open the mouth of a case slightly in order to seat a bullet more easily. Also called flare.
Belted case - A case with a band formed into the head of some cases (magnum type) to strengthen the case and to control the headspace of the cartridge.
Berdan primer- A common European priming system with no integral anvil. Instead, it makes use of an anvil formed in the case itself. It is fitted in the primer pocket in the head of centerfire cartridge cases.
Black powder - A mixture of charcoal, potassium nitrate, and sulfur used as a propellant in muzzleloaders and early cartridge firearms.
Boat tail - A bullet design having a tapered base.
Bore - The inside diameter of a barrel before the rifling is cut.
Boxer primer- A type of primer used in American rifle and pistol ammunition and featuring a self contained anvil. It is fitted in the primer pocket in the head of centerfire cartridge cases.
Brass - An alloy usually of 70% copper and 30% zinc of which most metallic cases are formed. The term also allies to the empty cartridge case.
Brisance - The detonation rate and intensity of an explosive such as a cartridge primer.
Bullet - That portion of the cartridge which becomes a projectile when in flight. Sometimes also called ball.
Bullet & powder scale - A device to weigh charges of powder. A beam scale is a scale where markers, called "poise", are moved along a weight graduated beam, as the pan is filled with powder, until the balance point is reached. An electronic device used to measure the weight of powder in grains or grams.
Burning rate - A term used to describe the rapidity with which a given powder will burn. The term itself is a relative one based on a comparison with other powders.
Caliber - The approximate diameter of a bullet or bore, expressed in hundredths of an inch or in millimeters. A bullet with a diameter of .308 inches is called 30 caliber (not .30 caliber).
Cannelure - A groove (or grooves) cut around the circumference of a bullet or case. These grooves, usually one to a bullet, provide the best means of securely crimping the case mouth into the bullet. In a case, the cannelure is used as a stop for an inserted bullet.
Canister powder - Powder which is manufactured to consistently meet a standardized specification and packaged so handloaders can get predictable results.
Cartridge - A completely loaded, ready-to-fire round of ammunition.
Case - A cylindrical container which holds the primer, powder and bullet. Also called hull, shell, or brass.
Case forming - To alter the shape of a case to a different shape or caliber.
Case neck brush - A metal or nylon brush and handle used to clean the inside of case necks.
Case trimmer - A device used to remove excess material from a case mouth. Metallic cases stretch after extensive reloading and firing because the brass flows forward. These cases must be trimmed back.
Case trimmer pilot - The pilot guides the cutting portion of the case trimmer by fitting inside the neck of the case to be trimmed.
Cast bullet - Bullets for rifle or pistol which are cast from lead or lead alloy. Muzzleloading projectiles and shotgun slugs are cast in pure lead.
Centerfire - Refers to a cartridge having a primer located in the center of its base. Most centerfire cases are reloadable.
Chamber - The part of the bore at the breech which is formed to accept and support the loaded cartridge.
Chambering - A designation given to cartridges with a specific caliber, case size and shape, case head configuration, design, and which should not be used in firearms designed for a different chambering. A chambering is given a name (ie 7mm Mauser, .357 Magnum) to distinguish it from other chambering. This name is usually indicated by a headstamp.
Chamfer - To bevel the inside of a case mouth. The bevel allows bullets to start into the case mouth without crushing the case.
Charge - The amount of powder used in the case at each loading. Also refers to the amount of shot used in a shotshell.
Choke - A constriction at the muzzle of a shotgun barrel designed to control the spreading of shot.
Chronograph - An instrument used to measure the velocity of a projectile.
Components - The parts that make up a cartridge. The case, primer, powder and bullet or other projectile.
Compressed charge - A charge of powder which so nearly fills the case that it is compressed when the bullet is seated.
Corrosion - The eating away of the bore or case by rust or chemical action.
Crimp - The bending inward of the case mouth to grip the bullet. Used only with bullets having a cannelure or crimping groove. With shotshells the term applies to the closure at the case mouth.
Crimped primer - A forcing inward of the brass around the top of the primer pocket. This is frequently found on military cartridges and is done to prevent set-back of primers. The crimp must be removed before repriming the case.
Deburr - To remove the small metal burrs or roughness from a case mouth or primer flash hole.
Deburring tool - The deburring tool removes burs from the inside and outside of any newly trimmed case mouths.
Decap - Removal of the spent primer from a fired case, most often accomplished by the decapping pin in a die during the resizing operation of handloading. Also called deprime.
Decapping pin - A needle-like rod in the sizer die which pushes out the spent primer.
Die - A tool that reforms cartridge cases and seats bullets. In bullet manufacture, a tool that swages bullets or cores, extrudes lead wire or draws jackets.
Dram equivalent - Term used to indicate that a charge of smokeless powder produces the same velocity of a given number of drams of black powder.
Drift - Deviation of a projectile from the line of departure due to its rotational spin or the force of wind.
Drop - The distance a projectile falls, calculated from the line of departure.
Double base powder - Smokeless powder made with nitroglycerine and nitrocellulose base.
Duplex load - The use of two different powders in loading the same cartridge. Not recommended for handloaders.
Energy - A projectile's capacity for doing work at a given range, expressed in foot-pounds.
Erosion - The wearing away of the bore due to friction and/or gas cutting.
Expander - The part of a die that expands the case mouth to receive the bullet.
Fireform - Reforming or changing the shape of a cartridge case by firing it in a chamber of a desired shape.
Flash hole - A hole leading from the primer pocket to the inside of a case through which the primer ignites the powder charge in a case.
Foot-pound - A unit of kinetic energy equal to the effort required to raise one pound of weight to a height of one foot, against the normal pull of gravity.
Freebore - The distance in the barrel, if any, which the bullet travels before it contacts the rifling. Some barrels are purposely relieved to allow the bullet considerable free movement before it strikes the rifling.
Gas checks - A copper or brass cup which is used to protect the base of a cast lead alloy bullet from the effects of burning powder gases.
Gliding metal - A copper-zinc alloy used for bullet jackets and gas checks.
Grain - A unit of weight measure. 437.5 grains equal one ounce; 7000 grains equal one pound.
Handloading - Another term for reloading.
Hangfire - Slang term for any detectable delay in cartridge ignition.
Head - The base of a cartridge case that contains the primer, rim, extracting grove, and headstamp.
Headspace - The distance from the breech face to the part of the chamber which acts as a stop and prevents the cartridge from moving forward.
Headstamp - Markings stamped into the head of a case indicating (in most cases) the manufacturer, caliber and name of the cartridge. On military cases codes are used to indicate manufacturer and date of manufacture.
Heel - The outer edge of the bullet base.
Hollow point - A bullet design which features an axial hole at the point. The purpose of the hole is to aid expansion on impact.
Ignition - The action of setting the powder charge on fire.
Keyhole - The imprint of a bullet which struck sideways on a target rather than point first.
Lands - The raised portion of the rifling.
Loading density - Ratio of the volume of the powder charge to the volume of the case. The higher the better in terms of accuracy.
Lube dent - A dent in the cartridge case caused by using too much lubricant when resizing.
Lube pad - A pad, impregnated with lubricant, on which cases are rolled before resizing.
Lubricant - Case sizing lubricant is used to reduce friction between the case and die during the resizing operation in reloading. Bullet lubricant is used to help minimize bore fouling when firing lead or lead alloy bullets.
Mercuric primer - An obsolete primer in which the priming material contains mercury.
Mid-range trajectory - Refers to the distance the bullet rises above the line of sight. Mid-range trajectory is calculated halfway between the muzzle and the target.
Minute-of-angle - A unit of angular deviation equal to 1/60th of a degree. For practical purposes, it is usually approximated as equal to one inch at 100 yards.
Misfire - The failure of a cartridge to fire after the firing pin strikes the primer.
Muzzle - The front end of the barrel.
Muzzle energy - See "Energy."
Neck - The upper portion of a cartridge case that grips the bullet. In a bottlenecked case, that portion of the case in front of the shoulder.
Neck-size - To resize only the neck portion of a case.
Neck sizer die - A die used to resize only the neck portion of the fired case back to approximately its original dimensions.
Non-corrosive - Usually refers to primers having a priming mixture which is free of corrosive compounds. Modern primers are non-corrosive.
Ogive - Refers to the nose shape of the bullet. The radius of the curve of a bullet nose.
Powder - The propellant used in most firearms. It produces a large volume of gas when ignited. There are two basic types; smokeless and black powder.
Powder charge - The amount of powder loaded into a case.
Powder funnel - A helpful accessory that facilitates transfer of powder from a scale pan or measure to a cartridge case.
Powder measure - An adjustable volumetric measure that meters out uniform charges of powder.
Powder & bullet scale - A device to weigh charges of powder. A beam scale is a scale where markers, called "poise", are moved along a weight graduated beam, as the pan is filled with powder, until the balance point is reached. An electronic device used to measure the weight of powder in grains or grams.
Press - The tool which performs the major tasks of handloading.
Pressure - The force exerted by a burning charge of a powder in the chamber of a firearm. Expressed normally in pounds per square inch.
Primer - A small metal cap containing a detonating mixture used to ignite the powder charge in the case.
Primer pocket - The cavity in the base of a cartridge into which the primer is seated.
Primer pocket swaging - The "smoothing out" of the crimped primer pocket found in military cases.
Most reloaders handload because it is interesting, less expensive than shooting factory loads and because they can often develop more accurate loads for specific guns.
By handloading you can save 50-65% as compared to the cost of factory ammunition. In my area, I can buy factory 30-06 ammo for about 60-90 cents per round, depending on manufacturer and load. About half of that price is for the reusable brass case and the cost of manufacturing. That's where the savings come in. Of course you'll spend around $200 for equipment, so you'll need to send a few round downrange before you actually realize any savings.
Handloaders generally make better shooters, because they can afford to practice more.
Through handloading you will develop a much keener knowledge of shooting technology and be able to tailor your ammo to a particular firearm. Also, you can shoot more for less, and practice makes perfect.
By careful experimentation within prescribed limits, you can improve your accuracy for hunting or target shooting by developing the load that works best in a specific firearm. And you can match your ammunition to the type of game you are hunting or your particular kind of target shooting.
Reloading requires you to save empty cases, thus preventing litter in the field or on the range. Besides, the case or is often the most expensive part of a loaded round, so saving your empties saves you money.
Reloading allows you to stay in close touch with shooting, even during the off season. It is an enjoyable pursuit that enhances shooting knowledge and ability.
The handloader can assemble ammunition that just isn't available commercially such as a batch of low-recoil 30-06 rounds with 100 grain cast lead bullets for some plinking that rivals the .22 LR in low cost.
Handloading may the only way to get ammunition for obsolete and wildcat guns.
The following list describes required and optional equipment in the order each item is most likely to be used. Most manufacturers sell their most popular reloading tools in a kit with a bit of a price break. With care, ammunition can be safely handloaded without using the optional tools, but these additional tools can help improve the accuracy of your product.
This is the most important accessory you must have. Without this information, you do not know what is a safe or unsafe load. Always keep current editions, because powder formulas change.
Most manufacturers of handloading equipment, powders, and bullets sell excellent handloading manuals. These books include step-by-step handloading instructions. They also give proven loads for all popular cartridges with various bullet weights and velocities. In most cases, these loads are safe for firearms in good condition.
A good example, which I use, is the Speer Reloading Manual. This manual is a complete, step-by-step, top rated reference for everything you want to know about handloading. It contains over 600 pages of information, data and illustrations.
You'll probably eventually want the manual for each brand of bullets you use.
There are many other excellent books in handloading which can provide supplemental information on the process. I've included several in the bibliography at the end of this page.
A solid workbench is essential. It needs enough mass (weight) to stay put while you're applying pressure to the handloading press.
Many handloaders find that the benchtop should be about as high as the handloader's beltline. Another recommendation is to stand 18 inches away from a wall, then pivot your straight arm toward the wall with your fingers outstretched. The point where your fingertips touch the wall is the ideal benchtop height for you.
You'll want enough bench space to lay out your tools and components.
A cabinet or some shelves to store and organize components is a nice addition. Shelves should be at least 12 inches above the benchtop.
You'll want a good overhead lamp to give you a nice, bright work area.
Any good workbench will do. I'm using a so-called workstation by Sears which is similar to a steel tool cabinet but has a 40-inch height and a 20x32-inch top suitable for mounting my press and other handloading tools. It has 5 drawers for storing components, dies, moulds, and other handloading paraphernalia. It's on wheels, so I can easily move it out of the way when not in use. If you want to build a nice wooden bench, a good set of plans is available from the National Reloading Manufacturers' Association, 1 Centerpointe Drive, Suite 300, Lake Oswego, OR 97035 for about $3.
Here is a description of my reloading bench pictured at the top of this page. My Sears "bench" is a 26" wide tool cabinet. Including the casters, the cabinet is 35" tall. The drawers are 3", 4" and 6" deep. Pick any good quality tool cabinet that fits your needs. Don't get a cheap model -- you need drawers that will hold lots of weight. Although my cabinet is a heavy-duty one, I wish I'd bought a larger one. I think spending another $50-100 would have been money well spent. The top 3" drawer has general tools such as mallet, ball-peen hammer, pliers, screwdrivers, wrenches, calipers, etc. The second 3" drawer holds my bullet molds, bullet sizing dies, bullet lube, etc. The 4" drawer holds my case care stuff such as sizing lube and pad, loading blocks, labels, impact bullet puller, primer tray, case neck lube kit and mica powder, etc. The top 6" drawer hold all my reloading dies. The bottom 6" drawer holds items I use infrequently such as extra tumbler media and brass for calibers I don't shoot or reload in the hopes that I'll be able to trade it for brass I can use.Here is how I attached the top: 1 - Decide how tall you want your counter top. If you like to stand as you operate your press, I suggest making the bench top level with your belt buckle. If you operate your press while seated, you'll need to experiment to come up with a height that is comfortable while seated on whatever you sit on (ie shop stool, chair). Subtract the height of your tool cabinet from the desired countertop height to determine how high the structure needs to be that you'll attach to the top of the cabinet. 2 - My countertop is a free 24x48" scrap tossed out by a local countertop installer. Using "Liquid Nails" adhesive (comes in caulk-type tubes) and 3/8" lag screws I attached 26" long 2x4s to the lower surface of the countertop to build it to the height determined in step 1. Pre-drill and countersink the holes, but be careful you don't drill deep enough to damage the "Formica" on the countertop. It'll end up heavier than you expect, but weight is good -- it adds stability to the bench. Paint the wood as desired. 3 - Remove the cabinet drawers for access to the inside surface of the cabinet top. Once again, pre-drill holes for more 3/8" lag screws along with large fender washers to attach the countertop assembly to the top of the tool cabinet. 4 - Replace the drawers. 5 - I added a large eye screw to each end of the countertop assembly -- about 12" from the back edge. I put two similar eye screws into the studs of the wall behind the reloading bench. I attached two turnbuckles to these pairs of eye screws to attach the bench to the wall. I can mash down on the press handle all I want and the bench won't tip or even wiggle. It's as solid as the house. However, by simply removing the turnbuckles, I can roll my bench anywhere I want. 6 - The countertop isn't long enough to permanently attach my my bullet sizing press and shotshell reloader. So, they are bolted to a 12x26" pieces of 3/4" plywood. When not in use, they're hanging from a hook in the ceiling. To use them, I clamp the plywood base to my bench to the right of my reloading press using c-clamps. This way, it only takes seconds to set up these other tools.
When fired, ejected empty brass nearly always land in the dirt. The result is dirt or dust inside and outside the case. Dirty ammunition is murder on firearm chambers and bores. Dirt isn't any better for your handloading dies, either. Therefore, a wise handloader ensures all his cases are clean before proceeding with the handloading process.
Simply washing with soap and water, rinsing, drying, and wiping cases is usually sufficient.
Electric tumblers are very effective cleaning cases and giving them a nice like-new shine. Fill the tumbler with cases and either granulated walnut shells or granulated corn cobs available from the same venders who sell the tumblers.
Vibrating tumblers cost from $50 and up.
Do not tumble loaded ammunition -- this can be very dangerous. Tumbling loaded ammo can break down the powder causing extreme pressure problems.
During each firing, the case is stretched by the expanding gasses. The diameter of the case is restored to factory specs by pressing it into a resizing die. The case also stretches in length and can become so long that it can fail to feed properly into the firearm.
Case length of used cases should be checked against the specs given in your handloading manual.
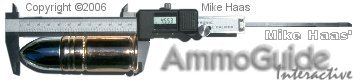
Caliper ($20 and up) can be used to exactly measure the case length.
A case length gauge (about $10) will quickly check case length. A typical gauge covers over 30 different cartridge lengths.
Every time you fire and handload a case it tends to stretch. When a case has stretched beyond the factory-specified maximum length, it must be trimmed to size.
Sometimes the case mouth is not square and should be squared for best accuracy.
A device similar in appearance to a small lathe easily and accurately trims cases to size. You will need trimmer pilot for each caliber you handload.
A good trimmer will cost about $45 and up.
Neck turning tool (optional):
Neck thickness can vary from case to case and may not even be even all the way around on a given case.
This tool shaves a bit of metal from around the neck to ensure consistent neck thickness. Remove just enough brass to get uniform neck wall thickness.
Don't cut so far down the neck that you get into the case shoulder. Doing so will severely weaken the case.
A case mouth deburring tool removes any burrs around the case mouth left after trimming. It also gives a slight bevel to the inside edge of the case mouth.
The primers in military brass are crimped in place, making decapping difficult. A decapping punch from Lee easily removed crimped primer from military brass.
A primer pocket tool reams the primer crimp found on military brass. Some primer pocket tools also square up the bottom of the primer pocket at a uniform depth. Be careful you don't take out so much metal the pocket won't hold a primer properly!
A primer pocket swaging die uses pressure to reform a military primer pocket to accept a new primer. Unlike a pocket reamer, a swaging die ensures the primer pocket is round and of correct dimension as well as free of crimping. Many handloaders prefer the swaging process over reaming the primer pocket.
Primer pocket brushes are used to clean out primer ash left by the spent primer with a twisting motion.
Burrs on the inside of the flash hole can cause erratic ignition. Some handloaders use a flash hole deburring tool to remove this burr.
Unless you are using carbide dies, you'll need to apply a thin film of lubricant to each case before resizing the case (and decapping the old primer).
Failure to lubricate will eventually result in a stuck case with the case base pulled off -- not a lot of fun to remedy. Too much lubricant can result in pressure dents in your cases.
A typical case lube kit contains a bottle of case lube, a case lube
pad and a couple of case neck brushes with an accessory handle.
A good lubricator kit, when properly used, will apply just the right amount of lubricant. Just a light amount of lube on the pad goes a long way. Simply roll several clean, empty cases on the pad together to lube several at once. You only need a light film on the cases. Do not lubricate the case shoulder.
Many handloaders use a spray lubricant rather than a pad.
Make sure you remove the lube before dropping the powder in -- oil will ruin your powder.
This tray is a clever little device that quickly orients primers anvil up for faster handloading. To use, scatter primers onto the grooved tray, then shake the tray horizontally until all primers are anvil side up. Primers can now be picked up manually and placed into the priming arm.
If using an automatic primer feed tube, replace the primer tray cover and invert. The primers are now anvil side down and can easily be picked up with the top end of your automatic primer feed tube.
Most handloading presses have a lever built in to prime empty cases.
Many handloaders use an automatic primer feeder. This is a tube which feeds primers to the priming lever on the press for quick priming of a large batch of cases. With this tool, primers will drop one at a time into the primer plug and sleeve on the handloading press. Depending on the cartridge you are loading, you will need different tubes for large and small primers.
A hand priming tool designed specifically for the priming process is available for around $28.
You will want two trays for each family of calibers you handload. One tray will hold cases which are ready for a specific step in the handloading process. The tray has holes to hold your cases upright so they don't tip and spill powder and for ease of grasping the next case to be processed. As each case is processed, it is placed into the second tray. When the first tray is empty, that handloading step is complete for all cases. You then switch trays and proceed with the next step, etc.
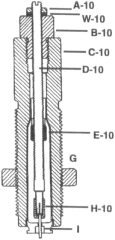
The press is used to resize the brass cases, replace the fired primers and seat the bullet.
Most handloading presses have a bench-mounted cast iron structure which holds a die on its top and a piston-like ram in the base which inserts the case into the die to perform various functions.
Most presses have a primer foot which presses a new primer into each case as it's processed.
Press sizes vary quite a bit. Make sure the one you buy will handle the largest cartridge you'll handload.
Some RCBS press models will also reload shotgun shells -- something to consider.
A good single-stage press will cost about $60 and up. With a single stage press, you will change handloading dies between each step, but this only takes a minute.
Some presses have a turret on top to hold a full set of dies as well as the powder measure. With such a press, all steps are completed on each cartridge without the need to set up for the next step.
A hand-held press is also available for about $30.
Cartridge cases come in a wide variety of shapes, lengths, and diameters. Most calibers share a head size and configuration with a family of other calibers. You'll need a shellholder for each cartridge family you'll load.
The shellholder is attached to the ram and grips the base of the cartridge as it is pressed into the dies.
Note: Most shellholder brands seem to be standardized as far as dimensions go, but different brands may be numbered differently. Therefore, if your shellholder brand isn't the same as the publisher of your reloading manual, the shellholder number listed in your manual may not match the number on your shellholder. This shouldn't be a problem. Just use the shellholder designated for that cartridge by your shellholder's manufacturer.
When a cartridge is fired, it actually stretches to tightly fit the gun's chamber. This seals the chamber, keeping gases from blowing back into your face. After combustion is complete, the case springs back slightly so it can be easily extracted from the chamber. However, it is still larger than before. It may no longer fit in another firearm of the same caliber and it likely will not hold a new bullet securely. It may not feed properly in a semi-automatic firearm, even in the same gun! Therefore, we must resize each fired case. This is done by forcing it into a die which reshapes it to factory dimensions.
You'll need a set of dies for each caliber you plan to handload. Dies are generally sold in sets of 2 or 3 dies for each cartridge caliber.
These dies perform various operations on the cartridge including decapping (removing the spent primer from the last loading), sizing (restoring the case to factory designed dimensions), seating the new bullet, and in some cases, crimping the case mouth to grip the bullet.
The decapping process is done at the same time as the sizing. This is done by a pin which presses the old primer out of its pocket. Most handloaders will eventually break this decapping pin, so it's a good idea to have a couple of spares on hand to avoid interruption of the handloading process.
You will use a set of two dies for loading bottleneck type cases (most commonly used in rifles). The first die is the resizing die and the de-capping die. At this point you put the new primer into the case. Some sizing dies have the option to open the case mouth up slightly at the extreme end of case travel. Most bullets have a slight indent at the base of the bullet and will begin the seat in the case with no widening of the case mouth at all, and will make a very snug fit that won't have to be crimped. But, if you plan to make some low powered, lead plinkers you would need the option to expand the case mouth a bit. The second die in the 2 die set is for bullet seating and crimping (if required).
You will use a set of three dies for loading straight-wall type cases (most commonly used in handguns). The additional die in a 3-die set is used to expand the mouth of straight-wall cases. These often use cast lead bullets and even when bullets are sized and lubricated, some lead can be shaved off if the case mouth does not have a slight "flare" or enlargement just where the bullet enters the case. This flare is closed when the bullet is seated or even reversed if you seat the bullet deep enough to crimp the case mouth. The first die of 3 usually just resizes the case back to original dimensions (in some dies it also decaps). The second die will decap (remove the primer) the case and "bell" or open the case mouth slightly. You control how much opening occurs by how deep you insert the case into the die. This is adjusted by how deep the die is screwed into the press and the lock ring on the die is set to the depth you prefer. At this point you put the new primer into the case. The last of the three dies is for bullet seating and closing the mouth of the case even or even crimping the case mouth on the bullet. Lead bullets usually either have a crimp grove or can be inserted just deep enough to get past the largest part of the bullet to put a slight crimp on the case.
Most dies are made of steel. One of the most important factors in selecting dies is the hardness of the steel and the polish of the inside (particularly the re-sizing die). The best dies are made of tungsten carbide and are not supposed to need lubricant. I use it anyway. Nickel-plated cases sometimes scratch steel dies and are best sized in carbide dies.
The sizing die gets a lot of hard work. If a case has a speck of sand or dirt on it, it can scratch the die. Then, every case sized after that will be scratched. Buy high quality dies. The extra cost up front will be well worth it. Of course, you still should take special care to have cases clean and free of corrosion, dirt, sand, and grit.
Additionally, always keep your dies impeccably clean and free of the slightest trace of corrosion. Accumulations of dirt, lube, wax, etc. on your dies not only increase the chance of damaging your dies and cases, they will change the way your dies form your cases or seat your bullets. Use a light oil (such as WD-40 or Hoppe's) on a Q-Tip to clean your dies after every use. The resizing dies seem to get the dirtiest the fastest. If you seat lubricated bullets, your seating die will accumulate dirt very quickly, too. Keep 'em clean!
Each die has a lock ring to lock it in the desired adjustment. The lock ring is prevented from moving out of adjustment by a set screw. I recommend you place a lead shot ahead of the setscrew. The lead is softer than the setscrew and will flow into the die thread to stop the lock ring from turning. Much less pressure is then required on the head of the setscrew and damage to the threads is avoided.
Many manufacturers make "competition" dies which are designed to ensure the bullet is seated in perfect alignment with the axis of the bullet and chamber. This increased precision would improve accuracy and would be especially important to competitive shooters. They cost substantially more, but if you need the best in accuracy, the cost would be worth it. Again, I've never used competition dies, nor have I felt the need for them since I don't shoot competitively. That said, the standard dies I buy on sale at Wal-Mart have always been very good to me. For example, I get 1/2" three-shot groups at 100 yards with my 30-06 reloads in my old GI Springfield 03-A3 with a 2-groove barrel. I just don't think expensive competition dies can do much better than that.
A typical two-die set costs around $25 and up while a three-die set costs around $35 and up.
Die locknuts:
These nuts that have a setscrew to lock the nut to the die. This saves you the time of adjusting the dies every time. This is especially important if you have a single stage press, since you are constantly switching dies out. I recommend you place a lead shot ahead of the setscrew. The lead is softer than the setscrew and will flow into the die thread to stop the lock ring from turning. Much less pressure is then required on the head of the setscrew and damage to the threads is avoided.
At least one manufacturer sells sets of dippers to measure the amount of powder to be poured into the freshly primed case.
Most handloaders use a mechanical powder dispenser made up of a hopper to hold a supply of gunpowder, a volumetric metering mechanism to measure powder quantity, and a drop tube to pour the measured powder into the waiting case. Such a measure will cost about $35 and up.
Fill the powder measure hopper with your favorite powder and adjust the micrometer adjustments on the side to dump exactly the right amount of powder into the case below the spout. A little "kicker" weight is used to shake the measure to ensure all the measured powder charge drops into the case (sometimes some sticks to the sides or hopper). You should always weigh several measures after you get it adjusted to ensure it is consistent with the load you want.
A good powder measure "throws" a well-controlled amount of powder directly into the empty case. A good measure will be accurate to about 1/10 grain. This is usually considered good enough for most shooting.
Some powders, due to their granule size and shape, are more difficult to measure consistently. When measuring these powders, it is especially important to be very uniform in your movements when throwing charges.
You will need a scale that weighs in grains. A very accurate scale designed to measure very small weights is essential. Accuracy to tenths of a grain is important. A postal scale just won't do!
It is necessary to always weigh your powder charge to know how much you are putting in the cases. Even the little "volume" measuring scoops people use need to be checked.
The accuracy of the charge thrown by the powder measure should be checked prior to each use, periodically during a handloading session, and when changing the amount or type of powder to be dispensed with each "throw."
Once the accuracy of the powder measure is established (and periodically verified), use of the scale is optional.
Shooters who are after the optimum accuracy and consistency usually weigh every charge.
The best scales use a magnet to dampen the beam oscillations for quick, accurate readings. Most handloaders use a balance scale costing around $60. Electronic scales are also available for about twice that price.
Check weights:
Use these calibrated weights to verify the accuracy of your scale. These are precision weights in various denominations, from .5 grain to 20 grains for a basic set.
Those handloaders who like to weigh every charge typically "throw" a slightly underweight charge from their powder measure. They then gradually add powder until the desired weight is attained.
A powder trickler let's you "trickle" little bits of powder into your scales to exactly measure the charge you want. For precision shooting, you might want exactly 48.5 grains of a powder. Set your powder measure to 48 grains, and bulk dump that into the dish on the scales. Then, with the trickler, you turn the knob and trickle in just the amount you need to exactly balance the scales at 48.5 grains. Now you have an exact load and can duplicate it for every round.
Funnel:
A funnel is essential for pouring weighed charges into cases without spillage.
Moulds are made of either steel, brass, copper, bronze, or aluminum and have a pair of handles.
Moulds open like a pair of tongs or pliers to drop the freshly cast bullet.
Aluminum, copper, bronze, and brass moulds are moulds are softer than steel moulds and are easily nicked or scratched, so they need a bit more care.
Steel moulds are likely to rust if not properly cared for.
I like the aluminum moulds (Lee brand moulds are a bargain and of excellent quality). They warm to casting temperature more quickly than the other metals, and need no break-in.
Prices run from less than $20 to $100 and more depending on brand, construction, and number of cavities.
Custom moulds can be ordered if you need a special size or shape of bullet. Be prepared to pay a premium price.
Most bullet casters use a cast iron pot placed over a stove to melt lead for casting bullets.
Some bullet casters use a pot or furnace with built in thermostatically-controlled electric heating coils to melt lead. The typical lead furnace will hold up to 20-25 pounds of lead. Some have a spigot for pouring lead from the bottom for increased convenience.
This is an important tool if you make your own bullets. It will size the lead bullet to exact caliber and put a lubricant in the lube groove(s) of the bullet to prevent leading of the barrel.
Labels:
Label every batch of ammunition you handload. You'll want to know how much of what components you used when you find that perfect load for your favorite rifle!
Many of the venders listed below sell stickers that you can apply to your cartridge boxes to record this information.
I also recommend you keep a logbook of each batch you load.
This is where you keep all of your loading information, as well as any chronograph reports. For every batch you make, record the date and batch number, along with primer type, powder type and weight, and the bullet type and weight. Once the batch is loaded, take the log book out to the range and record the performance of the load. If you have a chronograph, record the velocity of up to 50 rounds in the batch. Based upon these recordings, you can determine the consistency of the load.
A spiral bound notebook with entries containing the information from your labels will suffice.
This is one of the most expensive parts you will get, but it provides you the feedback on how your reloads are performing. This will let you know how fast your bullets are, and depending on the model, you can get average, high, and low velocities and standard deviation.
Sometimes we load a batch of ammo that just doesn't shoot well. It's nice to be able to disassemble such ammo and recover the components for reuse.
You insert the bullet, then rap it like a hammer on a hard surface. It uses inertia to harmlessly pop out the bullet so you can recover the components and try again on the round.
A good bullet puller costs around $15.
Kinetic Bullet Puller This device is for those "oops!" that come up occasionally.
The metallic cartridge case is the most expensive component of a loaded cartridge. This is the reusable part of the cartridge. You can usually handload a case 10-20 times, depending on case design, the care you give the cases, and the pressures to which they're loaded.
Most cases are made of brass, an alloy made of 70% copper and 30% zinc, although you might see some made of steel or aluminum. Only brass cases are reloadable. Sometimes you will encounter nickel plated brass cases, and they too are reloadable. Because these cases are plated, they’re likely to have less capacity than a regular brass case. Consequently, they produce higher pressures with the same charge. I suggest caution when reloading with these cases at or near case capacity. In addition to producing higher pressure, these cases will provide fewer reloads. Because nickel and brass don’t expand at the same rate, the plating may flake away from the brass. When this happens, the cases should be discarded. Nickel cases also scratch very easily during resizing. Extra lube or even a special sizing wax is suggested to help with the resizing process when you reload these cases. You may also encounter nickel-plated steel cases which are not reloadable. Military cases also have less capacity because they typically have thicker walls. Again, this can lead to higher pressures, so caution is recommended. These cases often have crimped-in primers, which are difficult to remove and the crimp interferes with seating new primers. If you work with military surplus cases, I suggest using the Lee Decapper instead of the decapping pin in your sizing die. This heavy-duty punch knocks out spent primers with the tap of a mallet. This will avoid constantly breaking your decapping pins. Then, ream out the primer pocket with Primer Pocket Reamer. The upside is that military cases are cheap, if not free. Again, discard steel or aluminum cases or cases with Berdan primer pockets.
There are three priming systems in use today: rimfire, Berdan (centerfire), and Boxer (centerfire). Only Boxer primed cases are handloadable with the equipment and materials we have readily available in the US.
The case is manufactured for a single specific chambering, for example 30-'06.
On the head of the cartridge, there is a head stamp which usually gives the manufacturer's identifier (W-W for Winchester-Western, R-P for Remington-Peters, etc.) as well as the chambering designation (such as 30-'06).
For best accuracy, it is generally considered best to use cases with the same head stamp when producing a handload batch. This is because different cases have different capacities and strengths.
There are two basic case types: straight wall and bottleneck. Examples of straight wall cases are 38 Special, 44 Magnum, and 45-70 Government. Examples of bottleneck cartridges are 30-'06, 308 Winchester, and 223 Remington. Straight wall cases are essentially the same outside diameter at the head of the case (except possibly excluding the rim) as they are at the mouth of the case. Bottlenecked cases are not. Bottlenecked cases have a shoulder area, where the case diameter is reduced before the case's neck.
Bullets are placed into the mouth of either straight walled or bottlenecked cases.
The areas of a bottlenecked cartridge (from the bullet end working towards the primer end) are: mouth, neck, shoulder, body, head (sometimes called base), extraction groove, and rim.
There is a primer pocket in the center of the head of both straight walled and bottlenecked cartridges, into which a primer is placed.
There are five basic case rim configurations: rimmed, semi-rimmed, rimless, belted, and rebated.
Within certain limits, it is possible to modify the shape of a metallic cartridge case so that it becomes a different chambering. For instance, if the neck diameter of a 308 Winchester case is decreased (called necking down) it is possible to create 7mm-08 Remington cases. It is also possible to neck up a 30-'06 case to a 35 Whelen case. There may be other operations required such as thinning or trimming the neck.
There are two general classes of commercially available bullets: jacketed lead and lead or lead alloy.
Jacketed bullets can be loaded to much higher pressures for higher velocities.
Most jacketed bullets are lead cores surrounded by metal jackets. The most common jacket metal is copper. Sometimes the cores are omitted, and the bullets are called solids.
Many handloaders also cast their own lead or lead alloy bullets. This adds a new dimension the fun and satisfaction of handloading.
Some handloaders also create their own bullets swaging -- to pressure-form by forcing the metal through or into a die.
Lead bullets can be reused if you can recover them, and are willing to remelt and cast them.
Bullets come in a wide variety of diameters, shapes, and weights. Always use the diameter (caliber) specified for your cartridge. Different shapes and weights are selected based on the intended use of the bullet.
In the lower powered pistol bullets, the best choice is often a lead bullet. They are cheap and work well. At velocities greater than about 900 fps some leading of the bore will occur. The exception is a lead bullet with a copper "gas check" on its base.
Hollow point bullets are when you want added expansion for hunting game.
Wadcutter bullets have a flat nose to cut a perfect round hold in the target. Many hunters also swear by the knock-down power of the wadcutter. If you use a pointed bullet and it exits the game, not all the stopping power of the bullet was used. If it stops in the game and does added tissue damage, the game will more likely be stopped cold. The lowly wadcutter fits this bill.
Certain bullet shapes are required for proper feeding (ie round nose in many automatic pistols) or safety (ie flat nose in tubular magazines).
In the high-power rifle pointed bullets for long range and high speeds are usually best.
Bullets have some or all of the following areas: base, body, grease groove(s), cannelure, ogive, and nose.
The bullet base is called flat-based if it is the same diameter as the bullet body. If the base is smaller than the body, it is called boat-tailed. If the base is concave, it is called hollow-based.
A metal disc called a gas-check may sometimes be placed on the base of lead bullets to help reduce leading, protect the base from powder gasses, and allow higher velocities.
The bullet body is the part that contacts the barrel. The body diameter is approximately the caliber size (such as .308 inches) but may be slightly different for accuracy considerations.
Cast bullets are frequently sized as a separate operation after they are cast.
Bullet grease grooves are normally only present on cast bullets, and contain lubricant (usually applied at the same time the cast bullet is sized). Lubricant helps reduce fouling in the barrel.
The bullet cannelure is an indented ring around the circumference of the bullet body of a jacketed bullet into which the metallic cartridge case may be crimped. The crimp is sometimes present to produce a more consistent grip on the bullet by the case neck, leading to more consistent velocities and hence better accuracy.
The bullet ogive is the curve of the bullet's body to the nose. This curve (in part) defines the sectional density, which contributes to the ballistic coefficient of the bullet and thus partially determines how the bullet travels through the air.
The bullet nose can be of several styles: flat nose, wadcutter, semi-wadcutter, round nose, truncated cone, spitzer, hollowpoint.
The design of a bullet can be made to emphasize various traits like expansion, penetration, ballistic coefficient, artistic beauty, whatever the designer values most. Most commercial bullets are compromises among these various attributes.
Bullet weights are measured in grains, just as powder. If you will examine loading data for a particular chambering such as 308 Winchester, you will notice that different amounts of the same powder are used to produce similar velocities when different bullet weights are used. You should never switch an existing load to a different bullet weight or style without going back to the loading manual for new data, particularly when working with near maximum loads.
All other characteristics remaining the same, a heavier bullet will be longer.
Different bullet lengths prefer different rates of rifling twist (measured by the barrel length used to make one complete rotation of the bullet). Longer bullets generally require a faster twist to stabilize them. Only experimentation will best determine the most accurate load for your firearm. To determine the rate of twist of your firearm, place some tape on your cleaning rod to form a flag near the handle, then place a tight cleaning patch on your cleaning rod tip, then start the rod down the barrel, then place a mark on the cleaning rod, then run the rod into the barrel until the flag makes one complete rotation, then put another mark on the rod. The distance between the two marks is the rate of twist. Once you know the twist rate of your firearm, you can approximate the best bullet length by the formula l = 150 x cal x cal / t where t is the rate of twist (in inches), cal is bullet diameter (in decimals of an inch), and l is bullet length (in decimals of an inch). Conversely, the ideal twist rate can be approximated by the formula t = 150 x cal x cal / l.
There are two general classes of gunpowder: blackpowder (and substitutes with similar burning characteristics) and smokeless powder.
Smokeless gunpowder dies not explode in your gun -- it burns very quickly. This combustion generally continues for the entire time the bullet is in the gun. The hot, expanding gasses of this combustion build up a very high pressure to accelerate the projectile down the barrel.
Smokeless powder develops much higher pressures when it burns. Therefore, never use smokeless powder in a firearm designed for blackpowder.
Blackpowder (
a mechanical mixture of 75% charcoal, 15% potassium nitrate [salt peter], and 10% sulfur
) is actually an explosive. It is sold in various granule sizes. This granule size affects the rate at which it burns. Always use the granule size specified for your firearm.
Smokeless powder also is sold in a variety of burn characteristics. Some are designed for pistols, some for shotguns, some for rifles, some for large cartridges, some for small. Always use a powder specified for your cartridge.
Powder is ignited by the primer's flame.
Burning rate is roughly how fast a particular powder burns. This is complicated by the fact that the burning rate varies with the pressure inside the cartridge and the barrel. In addition, the pressure changes (rapidly) over time.
Chemically, there are two varieties of smokeless powder: single-based and double-based. Single-based powders contain nitrocellulose. Double-based powders contain nitrocellulose and nitroglycerine. The addition of nitroglycerine makes double-based powders burn faster and hotter than single-based powders.
Smokeless powder comes as granules, and the granule shapes describe what category of powder it is. The shapes are: flake, ball (also called spherical), and extruded (also called stick). A particular type of powder will be all one kind of granule shape. The granule shapes as well as the chemical composition of the powder have direct bearing on the burning rate.
It is not possible to discern what kind of powder you have just by looking at it.
You want all of the powder to have burned by the time the bullet leaves the barrel. Muzzle flash is an indication that powder is being burned outside the barrel, meaning you are wasting powder.
There is a basic relationship between how much powder is placed in the case and how much pressure is produced when the cartridge is fired. The more powder in the case, the higher the pressure and the faster the bullet. However, too much pressure results in a decline in accuracy.
The primer is located in a pocket in the cartridge head. When struck by the gun's firing pin, it detonates, sending a hot flash through a hole in the head of the case into the powder, thus igniting it.
There are two styles of centerfire primers available today: Boxer and Berdan. Although the Berdan primer is an American invention, it is more popular in Europe while the Boxer primer, a European invention is more popular in the US. This photo shows two examples of 40S&W cases. The two cases on the left are Boxer-primed. Note the single concentric flash hole and the absence of an anvil. The Boxer anvil is an integral part of the primer -- not a part of the case. The two cases on the right are Berdan-primed. Note the concentric anvil located between two flash holes in the upper right. The Berdan primer has no integral anvil -- the Berdan anvil is an integral part of the case.
Because of special tools needed for Berdan priming and lack of availability of Berdan primers in the US, I will only deal with Boxer primers in this document.
Boxer primers consist of three separate subcomponents: primer cup, priming compound, and primer anvil. The primer cup is cylindrical, with one end open and the other enclosed. The primer anvil is placed in the open end, with the priming compound between the two. The primer anvil's shape is basically a disc with the center raised so it is adjacent to the priming compound. The priming compound is designed to be shock/crush sensitive, and is an explosive mixture.
When the gun's firing pin strikes the primer cup's closed end, it indents the primer cup. When the primer cup is deformed, it crushes the priming compound between the priming cup and the primer's anvil. This ignites the priming compound, sending a flame through the flash hole in the metallic cartridge case. Once a primer is fired, it is not reused.
The primer is inserted into the metallic cartridge case so the anvil end (the open end) faces the flash hole in the case and the closed end of the primer cup is slightly recessed into bottom of the metallic cartridge case. This is so that the primer only ignites when the gun's firing pin strikes it, rather than simply by bluntly striking the head of the cartridge. An example of such blunt impact might be dropping the cartridge on a concrete floor, or when the cartridge is slammed into the gun's chamber by a self-loading gun.
Fired primers are a good source of information regarding the pressure of the assembled cartridge. Primers which appear flattened are a good indication of excessive pressure, and mean you should not increase pressure any further (and possibly even reduce pressure).
Primers are sold in four different sizes and come with different burn characteristics. These are: small pistol, large pistol, small rifle, and large rifle. Primers also come in standard and magnum strength. Always use the correct type of primer as recommended by your reloading data source. Never switch to another strength (or even change manufacturer) of primer when working with anything besides starting loads. Magnum primers are not necessarily required for "magnum" cartridges. Magnum refers (in this case) to the strength of the flame produced by the primer.
Military ammunition usually will have primers that are crimped in place. This crimp makes removal of the spent primer a bit more difficult, but special tools are available for removing crimped primers and removing the crimp from the empty primer pocket.
Either buy bullet lead or mix your own alloy. Some plumbing supply houses still stock pure lead.
Pure lead is best for blackpowder shooting where velocities are low.
Due to bore leading at higher velocities and the higher temperatures of smokeless powder, I do not suggest using pure or scrap lead for velocities above 1,000 fps.
Scrap lead, although of unknown composition, is a very good source for low-cost lead. The most common source of scrap lead is used wheel weights, obtainable for free or very low cost from service stations and tire shops. You can just melt them down, flux, skim off the metal clips and debris, and you are ready to pour. It usually contains about 3% to 4% antimony to harden the lead.
I have found that wheel weights, being a bit on the soft side, have just about the right mix for pistol bullets at velocities up to 1,200 fps.
The stick-on type wheel weights for mag wheels are softer than clip-on type wheel weights. I set this lead aside for muzzleloaders since it
generally seems to be close to pure lead.
Some wheel weights are made of non-lead metals such as zinc. These are
unusable for bullets and if melted into your lead alloy, will ruin it3.
An alloy of 1 part tin and 16 parts lead can be created by adding solder to lead in the appropriate ration. This will give the hardness needed for velocities up to 1,500 fps.
Perhaps the best lead for reloading for modern pistols and rifles is linotype lead. This alloy is usually just the right hardness for velocities up to 2,000 fps with around 12% antimony and 4 percent tin.
Many commercial hard-cast bullets have between 6% and 7% antimony and about 2% tin. Many shooting supply shops sell pure and alloyed lead.
Higher velocities can achieved by using gas checks (a small copper cup crimped onto the bullet's base) paper patching, harder lead alloy, sabots (a plastic cup that falls away from the bullet after leaving the muzzle), and by jacketed bullets.
Some .22 rimfire bullets are made of zinc. Don't use them in lead bullets -- the zinc will ruin the casting quality of your lead3.
The lead alloy used in car batteries has concentrations of acid that make it unsafe to melt them. In addition, battery lead alloy in modern batteries contains arsenic and other metals that can ruin the lead for bullet casting.
Heat source:
You can buy an electric furnace if you are really serious or will cast a lot of bullets. They generally have a thermostat control for steady heat.
Some models have a spout on the bottom for pouring molten lead into your mould.
For most bullet casters, an iron pot is enough. I have an old one-quart cast iron saucepan that has served me well
for many years. Once a pot has been used to melt lead, it must never be used for cooking food. A gas stove is best for melting lead, but you can also use an electric stove. I use a propane camp stove.
For consistent results, you'll want a thermometer.
Casting process:
Warning: Never drop sprue cutoffs or culled bullets into molten lead. A splash will be a lasting reminder that hot lead takes forever to cool when it's on your skin or clothing.
The best temperature for casting is 650-750 degrees Fahrenheit.
If you're melting lead in an iron pot, you'll need a ladle to dip lead from the pot and pour it into your mould.
You'll need flux (I use a pea-to-marble sized chunk of beeswax) to encourage the lead, antimony and tin to properly alloy. It also helps separate the molten metal from the dross (dirt, rocks, wheel weight clips, etc.) which you need to skim off.
If using aluminum molds, coat the mold cavity with a film of carbon from the smoke of a match. This helps the mold to release freshly cast bullets.
Preheat your ladle and mould by immersing them in the molten lead for a couple of minutes.
While the mold is hot lubricate it by touching a bit of bullet lube to the sprue bushing, "v" ribs, locating pins and on the core pin (hollow point and hollow base molds). Use only the lube specified by the mold manufacturer. Some lubes will bake onto the surface and prevent proper closure.
Pour the molten lead into the mould until you have a puddle over the sprue hole about half an inch in diameter. As the lead cools, you'll see it change in color. Then pause a few seconds, then tap the sprue cutoff lever with a wooden mallet (I use an old hammer handle) to cut off the sprue. Never use a metal object for this purpose. Then drop the new bullet onto a soft cotton cloth or towel (most synthetic fabrics will melt). If you drop the hot bullet into cold water rather than onto a cloth, its hardness will increase -- a good thing if you want to reduce bore leading at higher velocities.
Hot bullets are very soft and easily damaged. Be gentle.
Warning: Hot, freshly-cast bullets look exactly like cold bullets. Don't
handle them until you are absolutely sure they have cooled.
Examine each bullet for voids, bubbles, creases, etc. If it isn't perfect, just recycle the lead and pour another. You may likely find that you'll pour a few bullets before the mould temperature is just right for perfect bullets.
Lead bullets should always be lubricated before use to prevent bore leading.
It's possible to use the lead bullets just as they come from the mould, but you'll get best results if you size them. You'll need a press and appropriate die for this step. Here is how I use my Lee bullet sizing kit to size my cast bullets:
Screw the sizing die into the reloading press. No special adjustment is needed.
Place the bullet punch in the ram.
Install the container on top of the bullet sizing die.
Coat the batch of bullets with a thin film of solid bullet lube and fill the lube grooves.
If the bullet is designed for gas checks, place a gas check on the base.
Place each bullet on the punch and press it into the die. Lubricating wax is forced into the bullet's lube groove(s). This ensures a perfect fit into the case neck and reduces bore leading.
The sized and lubricated bullets are ejected into the container on top of the die.
Relube with Alox bullet lube and allow to dry overnight.
2 Obturation is the plastic deformation of the bullet alloy as a result of the pressure applied to the base by the burning powder. By making the bullet soft enough that it can deform slightly upon firing, it does a better job of sealing the gases off behind it and minimizing blow-by and the leading that results from it. Best accuracy tends to occur
with a load approximating 90% of obturation pressure.
3Process wheel weights at
650ºf. At this temperature, zinc wheel weights won't
melt and can be skimmed off with clips, dirt, etc. and
discarded (zinc melts at 787°f). Then, cast into ingots for future bullet
casting.
4 When water-quenching bullets without
heat treatment, choose a sizer die that is just large
enough that very little sizing occurs to avoid
bullet
softening.
Flux with beeswax, paraffin, or commercial flux such as
Marvelux.
Covering the surface with sawdust, crumbled charcoal
briquettes can reduce oxidation, but fluxing is still
desirable to keep the alloy components properly mixed.
Allow bullets to age a few days before sizing.
Sizing the bullets will soften those areas of the bullet that get worked.
Therefore, if heat-treating bullets, size them first (but apply no lube), heat treat, then lube in the same sizing die.
If bullets are properly sized to the groove diameter of
the barrel, leading should be minimal if at all. Size
bullets to .001" larger than groove diameter. Smaller
diameters increase leading. A gas check will also
minimize leading since it acts in effect, as an increase
in bullet base hardness.
Ensure that all traces of jacket fouling are cleaned
from the barrel before shooting cast bullets. Copper jacket fouling will greatly promote leading in a barrel that otherwise would not lead foul at all.
Likewise, clean any lead fouling before shooting
jacketed bullets.
Salvaged battery
lead should always be avoided. It contains other metals
that are not conducive to good bullets.
The wisest approach to getting started in handloading is to learn from an experienced handloader who has no bad habits. The best mentor is an NRA Certified Reloading Instructor. If there isn't an NRA instructor in your area, talk to your local gun club or a good sporting goods store for a referral to an experienced handloader.
The handloading process involves several simple steps which must be performed correctly and in sequence. There are no shortcuts! Although the process is easy enough, it requires full concentration. Let everybody in the house know that you must have no interruptions or distractions except in an emergency.
The most efficient way to reload is to do a full batch one step at a time. For example, size and prime all cases in the batch, placing them in a reloading tray, then trim all cases in the batch, placing them in a different reloading tray, then charge with powder, placing them in the first (now empty) reloading tray, then seats the bullets into all cases in the batch, etc. Use two reloading trays, taking cases one at a time from one tray, performing an operation, then placing it in the second tray until the entire batch has passed through that step.
Warning: If the maker of your equipment gives instructions different from the instructions listed below, always follow the manufacturer's instructions.
Case inspection:
Examine cases before loading and discard any that are not in good condition.
Look for damage or flaws that may affect the performance or safety of handloaded ammunition. These flaws can include cracks and scratches in the case, large dents, or corrosion.
Watch for flattened, pierced, or cratered primers which indicate excessive pressure.
Watch for gas leaks around the primer indicating excessive pressure or an enlarged primer pocket.
Watch for spent primers that have backed out of the primer pocket indicating excessive headspace.
Watch for a bright colored ring around the case just above the web that is often an indicator of likely head separation.
Ensure each case is of the proper chambering.
Some steel cases are lacquered such that they can appear to be brass, so check unknown cases with a magnet. Steel cases should be crushed and discarded so you won't accidentally reload them.
Unless you are set up to reload Berdan-primed cases, crush and discard any cases with Berdan primer pockets (usually pockets containing 2 flash holes and a center post or anvil).
Discard cases of an unknown origin.
Case cleaning and lubrication:
Clean and corrosion-free cases have more than an esthetic value. They are less likely to get stuck in, or damage, your dies. Clean cases require less force during the sizing process. Dirty primer pockets can cause difficulty in properly seating new primers.
Clean the primer pocket of any primer ash using a primer pocket brush or a flat-bladed screwdriver.
Clean inside the case neck with a case neck brush or bore cleaning brush of appropriate caliber.
For best results, use a brass tumbler for cleaning. Tumble until your brass is clean. How long depends upon the amount of brass, condition of brass, and amount and type of tumbling media.
Tumbling media comes in two materials: granulated corncob or granulated walnut shells. Both media may be treated with brass polish designed for use in tumblers. Generally, the walnut is better at cleaning really dirty cases because it is harder. The corncob seems to give a brighter polish. No matter what you use, you can extend the life of your media by using media reactivator, which you pour into used media to restore its cleaning power.
Here are the steps I follow in using my brass tumbler:
Ensure each case is empty. Sometimes you'll find a pebble or even a smaller case or bullet jammed inside a case.
Remove mud, heavy accumulations of dirt, rocks etc. from your brass (with warm water as necessary, then dry).
Decapping prior to tumbling enables the tumbling process to clean the primer pockets. However, this means running dirty brass into your decapping and sizing die. Therefore, prior to tumbling, I like to decap my cases using a mallet and a Lee decapping punch (which doesn't mind getting dirty) (22 cal - Lee model #90103, 30 cal - model #90102). It's the only type of decapper that will reliably decap military crimped primers without breaking. You can also use a universal decapping die for this purpose, thus saving your precious sizing dies.
Clean the primer pockets with a primer pocket brush.
Ensure the primer flash holes are open and remove any flash hole burrs with a Lyman flash hole tool (necessary only on first reloading).
Set the tumbler on a flat concrete surface.
Fill the bowl about 2/3 full of cleaning or polishing media.
Plug in the tumbler power chord.
Add brass in any amount up to capacity. Tumbling capacity is reached when the tumbling action begins to become sluggish.
Tumble until the brass is clean -- about 30-60 minutes. If you want a brighter finish, you may tumble several hours.
Wipe with a rag and inspect for flaws such as cracks.
An alternative to a tumbler is to wash dirty cases in a case-cleaning solution or hot soapy water, rinse thoroughly, then dry in the hot sun or a warm oven (less than 200 degrees Fahrenheit -- too much heat can ruin the heat-treatment of the cases).
Swage the primer pocket with an RCBS primer pocket swaging die.
Lubricate the clean, empty shell before re-sizing the case (and decapping the old primer). While Tungsten Carbide pistol dies don't require lubricating, it's still a good idea. Just a light amount of lube on the pad goes a long way. You can place several cases on the pad and roll them together to lube several at once. You only need a light film on the cases. Inadequate lubrication will inevitably result in a case stuck in your sizing die. Do not get oil on the case shoulder. Doing so will result in pressure-dented cases as will excessive lubrication. Do not get oil inside the case. Oil will degrade your powder. Many handloaders lightly dust the inside and outside of the case neck with fine mica powder or powdered graphite as a neck lubricant while using liquid case lube for the case body.
Sizing and decapping:
This is done with your sizing die, the one with the little pin sticking out below the die.
Depending on how you set your sizing die, this steps restores the case neck, or entire case to standard dimensions.
If the reloaded cartridge is to be used only in the same firearm in which it was previously fired, you generally need only resize the neck. Otherwise, a full resizing is in order. Full resizing is also required for self-loading firearms.
This step also decaps (removes the spent primer) the case unless you have previously decapped using a Lee decapping punch or a universal decapping die.
Note: Military ammo generally has the primer crimped in place. Expect to use more force (and occasional broken decapping pins) to press out crimped primers. To remove military primers, I recommend a punch-type decapper (mine is made by Lee) and tap each primer out with a mallet. You'll then want to remove the lip left by the crimping with a pocket reamer or swager.
SIZING DIE PARTS
Spindle Lock Nut
A-10
Spindle Bushing
B-10
Sizer Die Body
C-10
Spindle
D-10
Expander Button
E-10
Die Lock Ring
G
Lock Nut
H-10
Decapping Pin
I
Coax Washer
W-10
Here's how to set up your sizing and decapping die:
Note: If the maker of your equipment gives instructions different from the instructions listed below, always follow the manufacturer's instructions. The following setup which is intended for steel dies and can damage carbide dies.
Raise the ram all the way to the top of the stroke.
Screw down your sizing die until it contacts the shellholder.
Screw the die in an additional 1/8 to 1/4 turn.
While holding pressure on the ram against the die, lock the die lock ring (G).
Loosen the spindle lock nut (A-10) and screw the spindle (D-10) up or down until it extends far enough to press out the spent primer. The end of the expander button must be at least 3/16" above the bottom of the die (The decapping unit will be damaged if it contacts the case web). Tighten the spindle lock nut.
As long as your lock nuts don't move and you always use the same press and shellholder, you should never need to do this setup again.
You can extend the life of your cases and even improve accuracy by resizing only the top 3/4 of the neck. This is called neck-sizing. I will not give instructions for neck-only sizing here, but be warned that full-length sizing (as described in this guide) is the way to go if you want reliable feeding in a non-bolt-action firearm or if you're handloading self-defense ammo. Additionally, I don't recommend neck sizing with the full length sizing die because the head space dimension of the case may be adversely affected.
Straight walled cases use an extra die to put a slight open bell on the case mouth to allow easy bullet seating later. Even necked cases are often belled to facilitate seating cast lead bullets. This operation is done to prevent the case from shaving the lead from the bullet and to prevent case buckling.
Here's how to set up your belling die:
Note: If the maker of your equipment gives instructions different from the instructions listed below, always follow the manufacturer's instructions.
Place an unlubed case in the shellholder and raise the ram to the top of the stroke.
Screw your die into your press until you feel a slight resistance.
Lower the ram
Screw the belling die in an additional 1/8 to 1/4 turn.
With the case in the shellholder, raise the ram, then lower it.
Examine the case to ensure it has been slightly belled.
With your fingers, fit one of the bullets you plan to load into the case mouth. If it fits inside the case mouth without slipping in, you're done.
If the bullet does not fit, go back to step 4.
If the bullet slips in too far, you've belled the case too much. Resize it and start over.
When you're satisfied with the amount of belling, lock the die lock ring.
As long as your lock nuts don't move and you always use the same press and shellholder, you should never need to do this setup again.
Some belling dies allow you to dump your powder down through the die and into the case at the same time you're belling it.
Case lubrication is not needed for the remaining handloading steps. Wipe all lube from the sized (and belled if applicable) cases.
Inspect each case to ensure the flash hole is clear and that no tumbling media remains in the case.
Priming:
Warning: It is especially important to wear safety glasses during this step.
Never seat a primer into a case containing powder.
Decapping live primers is extremely dangerous. Don't do it.
Many reloading presses have a priming arm that inserts a new primer as the freshly sized case is withdrawn from the sizing die. Most presses have provisions for a tube that automatically feeds a new primer into the priming lever. Once you get the hang of it, you can do the decapping and resizing in the above section and reprime the case, all in one easy stroke.
Ensure you use the correct size primer plug and sleeve on your primer arm or device.
Here are the steps of priming using the primer arm on your reloading press:
After raising the press ram to full height to resize your case, place a fresh primer in the primer arm cup and push the primer arm into the slot cut into the ram.
Gently lower the ram. As the case descends from the sizing die, it will be lowered onto the live primer, seating it into the primer pocket. Be careful and seat the primer slowly to avoid detonating the primer. Don't look down into the case while pressing the primer home. Primers contain lead styphanate, which is an explosive. You would be surprised how much fire comes out of one primer and how far it spits out.
Raise the ram just enough to let the primer arm out of the ram slot. (If you raise the ram too far, you'll punch the new primer out of the case.)
Lower the ram and remove the newly primed case.
Inspect each inserted primer.
The surface of the primer should be smooth and slightly below the level of the case base. This protects the primer from firing prematurely when being slammed into the chamber by the bolt.
A primer that is too high is often a result of a dirty primer pocket.
Military ammo generally has primers crimped in place. Before handloading used military brass, you will need to carefully ream or swage the crimp to allow seating of a new primer.
A hand primer is a nice-to-have item. With a hand press, you can prime your brass in your easy chair inside where it's warm. It is important to have eye and ear protection.
Case trimming:
In the firing and the sizing processes, the case tends to stretch a bit. This can affect chambering, pressures during firing, and accuracy. Measure the case length and trim if necessary.
If you will crimp your bullets, all cases must be exactly the same length.
I usually trim to about 5 to 15 thousandths of an inch shorter than the dimensions specified in my reloading manual.
Here is how to use a typical trimmer:
Insert the correct shellholder in the trimmer.
Insert the correct pilot in the trimmer.
Adjust the trimmer to the desired length. Using a dummy case that is already of the correct length will speed this step.
Insert case in shellholder.
Start pilot into case mouth.
Lock case in place.
Rotate cutter handle with light inward pressure until you reach the stop set in step 3.
Remove the case and check length with caliper or case gauge.
Use a neck turning tool to ensure necks are of consistent and even thickness. Remove just enough brass to get uniform neck wall thickness. Don't cut so far down the neck that you get into the case shoulder. Doing so will severely weaken the case.
Trimming is followed by chamfering the case mouth (inside and out) and a twist of steel wool for a smooth finish.
Tumble for a few minutes to clean up the metal shavings.
Recheck for flaws such as cracks and splits in the case.
Powder charging:
Primed cases are filled with a carefully measured powder charge. You must follow prescribed data in a handloading manual.
Powder may be measured by a calibrated dipper, a volumetric powder measure or by weighing each individual charge.
Here is how I use my RCBS Uniflow powder measure:
The Uniflow comes with two measuring cylinders. The large one is suitable for all cases, but for small cases, it is best to use the small cylinder.
Before using the measure for the first time to charge cases, run a pound of powder through the powder measure. This coats the inner surfaces and helps the powder flow through the measure more evenly and consistently.
Use uniform movements for each powder charge. To throw a charge, raise the handle until it comes to the end of the stroke with a tap. Then lower the handle in the same manner. Some powders measure very easily and consistently. Others, with large or long kernels are more difficult to measure and some kernels are actually cut in the measuring process. Consistent taps on the powder measure strokes will insure all the powder drops into the case.
The accuracy of volumetric measures must be calibrated and checked by weighing samples at the beginning of a reloading session. Adjust the measuring screw as needed, then tighten the lock ring. Write down the approximate number setting for future use.
Throughout the charging process, weigh samples of the charges thrown (one of every 5-10 cases) to ensure consistent and safe loads.
Using the powder measure is faster by having your cases in a shell holder, you just go right down the line dropping powder in.
Here is how I use my RCBS scale to check charge weights:
Ensure the scale is zero balanced before use and checked periodically for maximum accuracy and safety.
It is best to not locate your scale on your reloading bench because movement of the bench while working the press may affect the zero of the scale.
Set the scale to the desired charge weight.
Throw a charge from the powder measure into the scale pan, then weigh.
Adjust the powder measure as needed to throw the correct charge weight.
Throughout the charging process, weigh samples of the charges thrown (one of every 5-10 cases) to ensure consistent and safe loads.
When finished with a tray of cases, inspect each one to make sure no cases are empty or have a double charge. Either situation could result in a terrible accident or fatality. Many handloaders also stick a dowel into each case to check for uniformity of powder depth.
Powder should not be left in the hopper. The powder will degrade and may even damage your powder measure. Always return leftover powder to the factory container at the end of each handloading session.
Bullet seating:
A bullet seating die seats a bullet into the neck of the case to the proper depth, completing the cartridge.
With some handgun and rifle dies, the seating die also crimps the case into the bullet, preventing bullet movement under recoil. Crimps are only applied to lead bullets and to jacketed bullets with a cannelure.
Most dies also have a crimp feature so while the bullet is being seated, a crimp is applied at the same time. The crimp is important for several reasons. It keeps the bullet from falling out of the case and it holds the bullet long enough for proper pressure to build up.
Over-crimping may cause an overpressure situation by holding the bullet for too long.
The more crimp you put on a case, the sooner it will begin to split at the mouth and will have to be discarded.
With a roll crimp the seating die actually rolls a very small portion of
the case mouth into the bullet cannelure. A taper crimp die actually squeezes the case around the bullet with no visible indentation or crimp. The taper crimp die merely removes the bell from the case mouth that was used to ease seating of the bullet and pushes the case mouth parallel to the bullet.
SEATING DIE PARTS
Bullet Seating Stem
J-30
Lock Nut
K-30
Die Body
L-30
Return Spring
M-30
Retainer Ring
N-30
Sleeve
O-30
Die Sliding Chamber
P-30
Die Lock Ring
G
Here's how to set up your seating die (without crimping):
Note: If the maker of your equipment gives instructions different from the instructions listed below, always follow the manufacturer's instructions.
Place a sized, primed, charged case in the shellholder.
Raise the ram all the way to the top of the stroke.
Screw down your seating die until you feel it touch the case mouth.
Back up the die 1/8 of a turn -- never more. This leaves a gap of about 1/16".
Lock the die lock ring (G).
Back out (raise) the seating stem (J-30).
Lower the ram and insert a bullet in the case mouth.
Slowly raise the case into the seating die.
Screw in the seating stem until you feel resistance.
Lower the ram and check bullet seating depth. Generally, the base of a properly seated bullet is level with the lower end of the case neck. This is not always true, due to varying bullet weights and types. Generally, I seat cannelured bullets to cover 90% of the cannelure.
Using a case gauge or caliper, check the overall length (OAL) of the cartrige to ensure it meet the standards specified in your reloading manual and ensure it feeds properly in your firearm.
If the overall finished cartridge length is too long, loosen the lock nut (K-30) and screw the bullet seating stem (J-30) down until cartridge length is correct. Tighten the lock nut (K-30).
If the overall finished cartridge length is too short, loosen the lock nut (K-30) and screw the bullet seating stem (J-30) up until cartridge length is correct. Tighten the lock nut (K-30).
SEATING DIE PARTS
Bullet Seating Stem
J-30
Lock Nut
K-30
Die Body
L-30
Return Spring
M-30
Retainer Ring
N-30
Sleeve
O-30
Die Sliding Chamber
P-30
Die Lock Ring
G
Here's how to set up your seating die (with crimping):
Note: If the maker of your equipment gives instructions different from the instructions listed below, always follow the manufacturer's instructions.
The trick is to set the bullet seating depth first, then the crimp.
Place a sized, primed, charged case in the shellholder.
Raise the ram all the way to the top of the stroke.
Screw down your seating die until you feel it touch the case mouth.
Back up the die 1/8 of a turn -- never more. This leaves a gap of about 1/16".
Lock the die lock ring (G).
Back out (raise) the seating stem (J-30).
Lower the ram and insert a bullet in the case mouth.
Slowly raise the case into the seating die.
Screw in the seating stem until you feel resistance.
Lower the ram and check bullet seating depth. Generally, the base of a properly seated bullet is level with the lower end of the case neck. This is not always true, due to varying bullet weights and types. Generally, I seat cannelured bullets to cover 90% of the cannelure.
Using a case gauge or caliper, check the overall length (OAL) of the cartrige to ensure it meet the standards specified in your reloading manual and ensure it feeds properly in your firearm.
If the overall finished cartridge length is too long, loosen the lock nut (K-30) and screw the bullet seating stem (J-30) down until cartridge length is correct.
If the overall finished cartridge length is too short, loosen the lock nut (K-30) and screw the bullet seating stem (J-30) up until cartridge length is correct.
While the uncrimped cartridge is still in the seating die, unscrew the seating stem (J-30) several turns.
Raise the ram
Lower the seating die body until you feel the resistance of the built-in crimper touching the case mouth.
Lower the ram.
Screw the die in an additional 1/8 turn.
Raise the reloaded cartridge, then check the crimp. If more crimp is desired, turn the die in increments of an additional 1/8 turn.
When the crimp is satisfactory, set the large lock ring (G).
Raise the completed round into the die and lower the seating stem (J-30) until it contacts the bullet. Tighten the lock nut (K-30).
Once adjusted, the bullet is seated and crimped in one operation.
Before completely loading a whole batch of ammo, ensure the first few rounds function properly in your firearm.
Revolver: The cartridge should enter the cylinder freely and fully. If you experience resistance or friction near the case mouth, you probably used to much flare or bell. If it sticks near the rim, you probably did not size the case correctly.
Semi-auto pistol: Remove the barrel and ensure the cartridge enters the chamber freely and fully. If you experience resistance or friction near the case mouth, you probably used to much flare or bell. If it sticks near the rim, you probably did not size the case correctly. Press the bullet against the bench. If the bullet moves deeper into the case, you need a tighter crimp.
Bolt-action: Cartridges should feed easily and reliably from the magazine. The action should close without unusual force. Cartridges should extract easily and without the bullet remaining lodged in the gun.
Lever-action, slide-action and auto-loader rifles: Cartridges should feed easily and reliably from the magazine. The action should close easily. Cartridges should extract easily and without the bullet remaining lodged in the gun. Press the bullet against the bench. If the bullet moves deeper into the case, you need a tighter crimp.
Don't be afraid to throw out your first few rounds until you get the die set correctly. Using a bullet puller, you may be able to disassemble defective rounds and reuse at least some of the components.
Final Inspection
If loading cast bullets, wipe any lubricant from the completed round.
Examine each case for signs of stress such as cracks.
Ensure primers are properly seated flush or slightly below the head surface.
Ensure cases are properly crimped if appropriate.
Ensure overall cartridge length is correct.
Store in a properly marked box or case designed for storing this particular chambering.
Label your cartridge boxes with details about each load. Many of the venders listed below sell stickers that you can apply to your cartridge boxes to record this information.
Store in a cool, dry place.
Store in a lockbox or safe separately from your firearms.
Log the details about the load in your logbook as well as how well they shoot.
Cleanup
After each use, clean, then wipe your dies and bare steel surfaces of the ram on your press with a light coat of gun oil using Q-tips and gun cleaning patches to remove foreign material such as bullet lube, fingerprints and to protect against corrosion.
Lubricate moving parts of your press with gun oil.
Do not apply oil where it could come in contact with powder or primers. Oil will deactivate these components.
Do not attempt to save powder which has been spilled on the floor. Discard it in a safe manner.
The final test
After loading about 10 rounds, take 'em to the range to see how they shoot.
If you experience excessive pressure, stop shooting immediately! Excessive pressure is indicated by:
Split cases
Backed-out primers
Flattened primers
Excessive recoil
Hard extraction of spent cases
Keep a record of how each batch shoots. See the above links for sample logbooks.
Adjust the recipe in half-grain increments and experiment with different primers until you find the magic load for your firearm.
Never exceed the maximum load listed in your manual. Never shoot a recipe that shows any sign of excessive pressure as indicated above.
Uniformity is key for accurate loads. The most critical areas to focus on for best accuracy are case preparation and bullet seating.
Different brands of cases and even within a brand can vary in case wall thickness and web thickness in the head. This affects powder capacity and pressure. Differing case wall thickness will also cause cases to react differently when they are fired, affecting consistency. One way to increase uniformity is to sort your cases by brand or manufacturer and lot number. Military cases also have headstamps indicating information such as manufacturer. Perhaps, even better, many top competition shooters sort their cases by weight to get better uniformity. A variance of 1.5% of case weight or less within a batch is acceptable.
Trim every case to exactly the same length as specified in your loading manual, ensuring each case mouth is perfectly square
Using a primer pocket uniforming tool, lightly ream the bottom of all primer pockets to ensure they are square and of uniform depth.
Lightly deburr the inside and outside of the flash holes to ensure they are the same diameter and free of burrs.
If using in the same firearm in which it was last fired, consider neck sizing only. Alternatively, measure a once fired case and set your die to size to that dimension. Your brass will have minimal headspace. This method of sizing will give you better brass life since the shoulder moves forward very little each time you fire the case. Many competition shooters size their cases a tiny bit ( to almost zero headspace) every time they shoot them. This makes the "feel" of the bolt closing the same every time they load a round. Exceptions are circumstances where feed reliability is essential such as personal defense, ammo you'll take on a hunt, and semi-automatic, slide-action, and lever-action firearms. In these cases, you should resize to factory dimensions every time you reload them.
Variations in neck wall thickness can result in misalignment of the loaded round in the chamber. After sizing cases, use a case neck turning tool to ensure uniform thickness all around the neck. Remove just enough brass to get uniform neck wall thickness.
Don't mix primer brands or types within a batch. Do experiment with different primers to find the one that works best for your gun.
Try using a hand-held primer-seating tool rather than the one on your reloading press. You'll get a better feel. Seat the primer by feel to the bottom of the primer pocket. Rotate the case 180 degrees and gently press the primer to ensure it's square in the pocket.
Weigh every powder charge to ensure each case gets exactly the same charge. However, with practice and a good powder measure, a good powder measure technique should be good enough to throw charges that are consistent to within 1/10th of a grain. This good enough for any competition.
Generally, faster powders give better accuracy. Select a powder towards the fast end of those listed for your particular bullet combination, yet still fills at least 90% of your case. Faster powders will generally create less gas volume which disturbs the bullet less after it exits the muzzle. With slower powders, this bullet disturbance results in what is called "tip-off" where the bullet is thrown off-course by the high pressure gas pushing around the sides of the bullet after it exits the barrel.
Cartridges are designed to shoot within a certain velocity range. Most cartridges shoot best at near their potential with bullets near the middle of the weight range. For best accuracy generally stay away from high pressure loads.
A powder charge that neatly fills the case seems to burn more consistently from one round to the next.
For target shooting, select a match grade bullet. Their construction and weight are more consistent and are optimized for accuracy. However, do not use match bullets for hunting -- even if a match bullet is a hollow point, it is not designed to expand and is more likely to ricochet than a bullet designed for hunting.
Don't just consider boat tail bullets when searching for accuracy. You may often find that a flat-base bullet shoots the best in your firearm.
Seat bullets to a uniform depth.
When seating the bullet, seat it about halfway, then rotate the case halfway around in the shellholder and complete the seating process. This technique sometimes averages out any remaining misalignment.
Use a competition bullet seating die. The cost more, but they give better support to the case and bullet to ensure straighter bullet seating.
Seat the bullets so they almost touch the rifling. To find this seating depth, make a dummy round (no primer or powder) and use a marker or grease pencil to color the bullet. Chamber the round and adjust seating depth until you see that the bullet is contacting the rifling. Then adjust the seating die to seat a bit deeper and tighten the lock ring.
Consider the twist rate of your firearm when selecting bullet lengths. Heavier bullets in a given caliber need a faster twist for stabilization.
Keep careful records of what you load, so that when you hit the magic recipe, you can duplicate it.
When experimenting, start at the minimum charge given in your loading manual and load batches of 7-10 rounds, increasing the powder charge in 1/2 to 1 grain increments up to the maximum given in your manual. Mark each 7-10 round batch. At the range, shoot each batch beginning with the lightest charge and record the results. Stop when you reach a charge that shows signs of excessive pressure. Repeat these steps while varying bullet seating depths, bullet weights, powder, and primer brands. With good records, you can easily recognize the best load(s) for your gun.
When adjusting a seating die to obtain a particular over-all length, most reloaders use the old "trial and error" method. Turn down the seating screw a bit, seat the bullet, measure the cartridge with caliper and repeat, until the correct length is reached. To speed up the process, using a little math will help. Lyman seating screws have 20 threads per inch. This means that one turn of the screw equals .050" change in seating depth. A half of a turn would then get you .025" change in depth, while a quarter of a turn would get you .0125". Now when you take your first measurement after starting a bullet into the case, you can get very close to your final length by knowing how much change one turn of the screw will make.
Bullet RPM = 720 x MV / TW, where MV = muzzle velocity (fps) and TW = rifling twist rate in inches per turn
Muzzle Energy = (MV2 x BW) / 450436, where MV = muzzle velocity (fps) and BW = bullet weight in grains
Approximate twist rate required to stabilize a bullet at velocities up to 1800 fps = (150 X D2) / L, where D = bullet diameter in inches and L = bullet length in inches
Approximate twist rate required to stabilize a bullet at velocities over 1800 fps = (180 X D2) / L, where D = bullet diameter in inches and L = bullet length in inches
Maximum bullet length for a given twist rate at velocities up to 1800 fps= (150 x D2) / TW, where D = bullet diameter in inches and MV = muzzle velocity (fps)
Maximum bullet length for a given twist rate at velocities over 1800 fps= (180 x D2) / TW, where D = bullet diameter in inches and MV = muzzle velocity (fps)
Forfireforming medium-capacity cases such as .308, 7.5x54, 7.7 Arisaka, etc. try 7 grains of Unique as a starter. Prime, add powder, then fill the case to base of the neck with corn meal or cream of wheat. Tamp a tissue paper plug onto the filler so that the whole assembly is solid and safe, then fire. If they do not blow the case out as needed, increment the powder charge until it works. Warning: These are extremely loud. The wadding and filler can still cause great injury at close range!
It is not uncommon to encounter compressed powder charges when reloading. The amount of compression can vary based on the internal volume of a specific case. To determine if the powder is being excessively compressed, it is a good idea to measure the over-all length of a cartridge immediately after the bullet is seated. Measure the over-all length again in 24 hours. If the length of the cartridge has increased by more than .010”, the load is excessively compressed. This is due to the excessively compressed charge pushing the bullet upwards. To correct this situation, reduce the powder charge several tenths of a grain and repeat the test.
I posted the following report on a reloading
forum on 1 Apr 2008:
I'd like to report on a project I'm working
on with a fellow shooter. We decided to work up a new wildcat using
a Model 98 Mauser action and the .50 BMG cartridge. We necked the
case down to .17 caliber. That was easy enough, although we had to
turn the case neck down to remove considerable brass thickness. We
bought some custom dies from RCBS and loaded up 20 rounds.
Next was adapting the Mauser action to accommodate the new
wildcat round. We had to lengthen and widen the action and magazine box to
accommodate the length of the loaded cartridge. We also had to
modify the bolt face and extractor to fit the case head. With that
accomplished we installed and chambered a new .17-caliber barrel.
Now, off to the range. Velocities were off scale for my
chronometer, so we borrowed two more. By putting the three
chronometers in series, we were able to measure the bullet velocity
at an average of 9,419 fps. After 5 rounds, we inspected the bore
and found considerable copper fouling. We believe this is due to the
partial vaporization of the bullets at this high velocity. (We
estimate that only 3% of the bullet reaches the target.)
To reduce fouling, we decided to try the opposite of moly-coating
bullets. We disassembled the 15 remaining cartridges and treated the
bullets with a thin coating of epoxy, then rolled the bullets in
fine sand (kinda like breading chicken). When the coating cured, we
loaded up 20 rounds and headed for the range again.
The treatment seemed to reduce copper fouling a bit with a
sacrifice of velocity (down to 8,979 fps), but now were getting some
bore erosion from an undetermined cause.
This new wildcat round shows considerable promise, but more study
is required. We'll experiment with different sand grits for the
bullet coating to find something that controls copper fouling and
bullet vaporization without the bore erosion and loss of velocity.
We'll try different powders and bullet weights and maybe even some
cast lead bullets.
Until we publish a full report, we recommend you don't try this
at home. We plan to publish our full report in about one year -- on
April 1, 2009.
Note: On 13 Jan 2011 another website,
Everyday,
No Days Off Gun Blog posted a
page on a similar wildcat cartridge. So, there seems to be some
real interest in this concept. My cartridge is a bit different from
Mike's in that mine appears to have a longer neck (0.199") and a 30-degree shoulder.
While we thank them for their support of this website, the ol' Buffalo had no role in picking the GoogleAds herein. Their appearance is not an endorsement by the Ol' Buffalo.
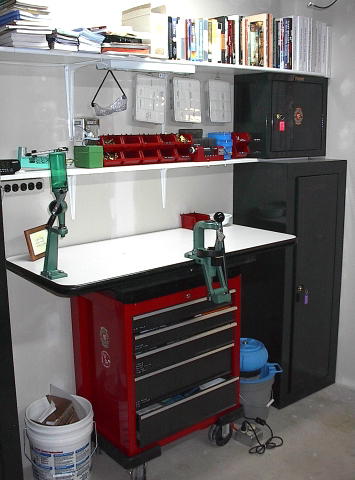


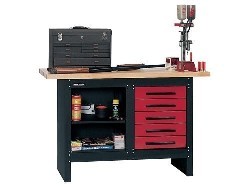
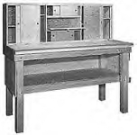
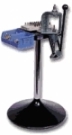
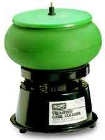
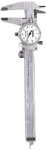
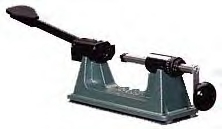
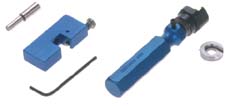

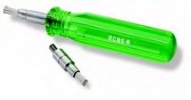
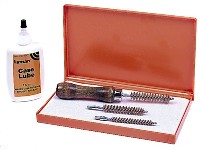
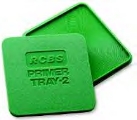
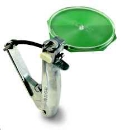
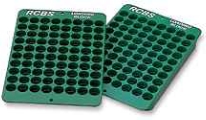
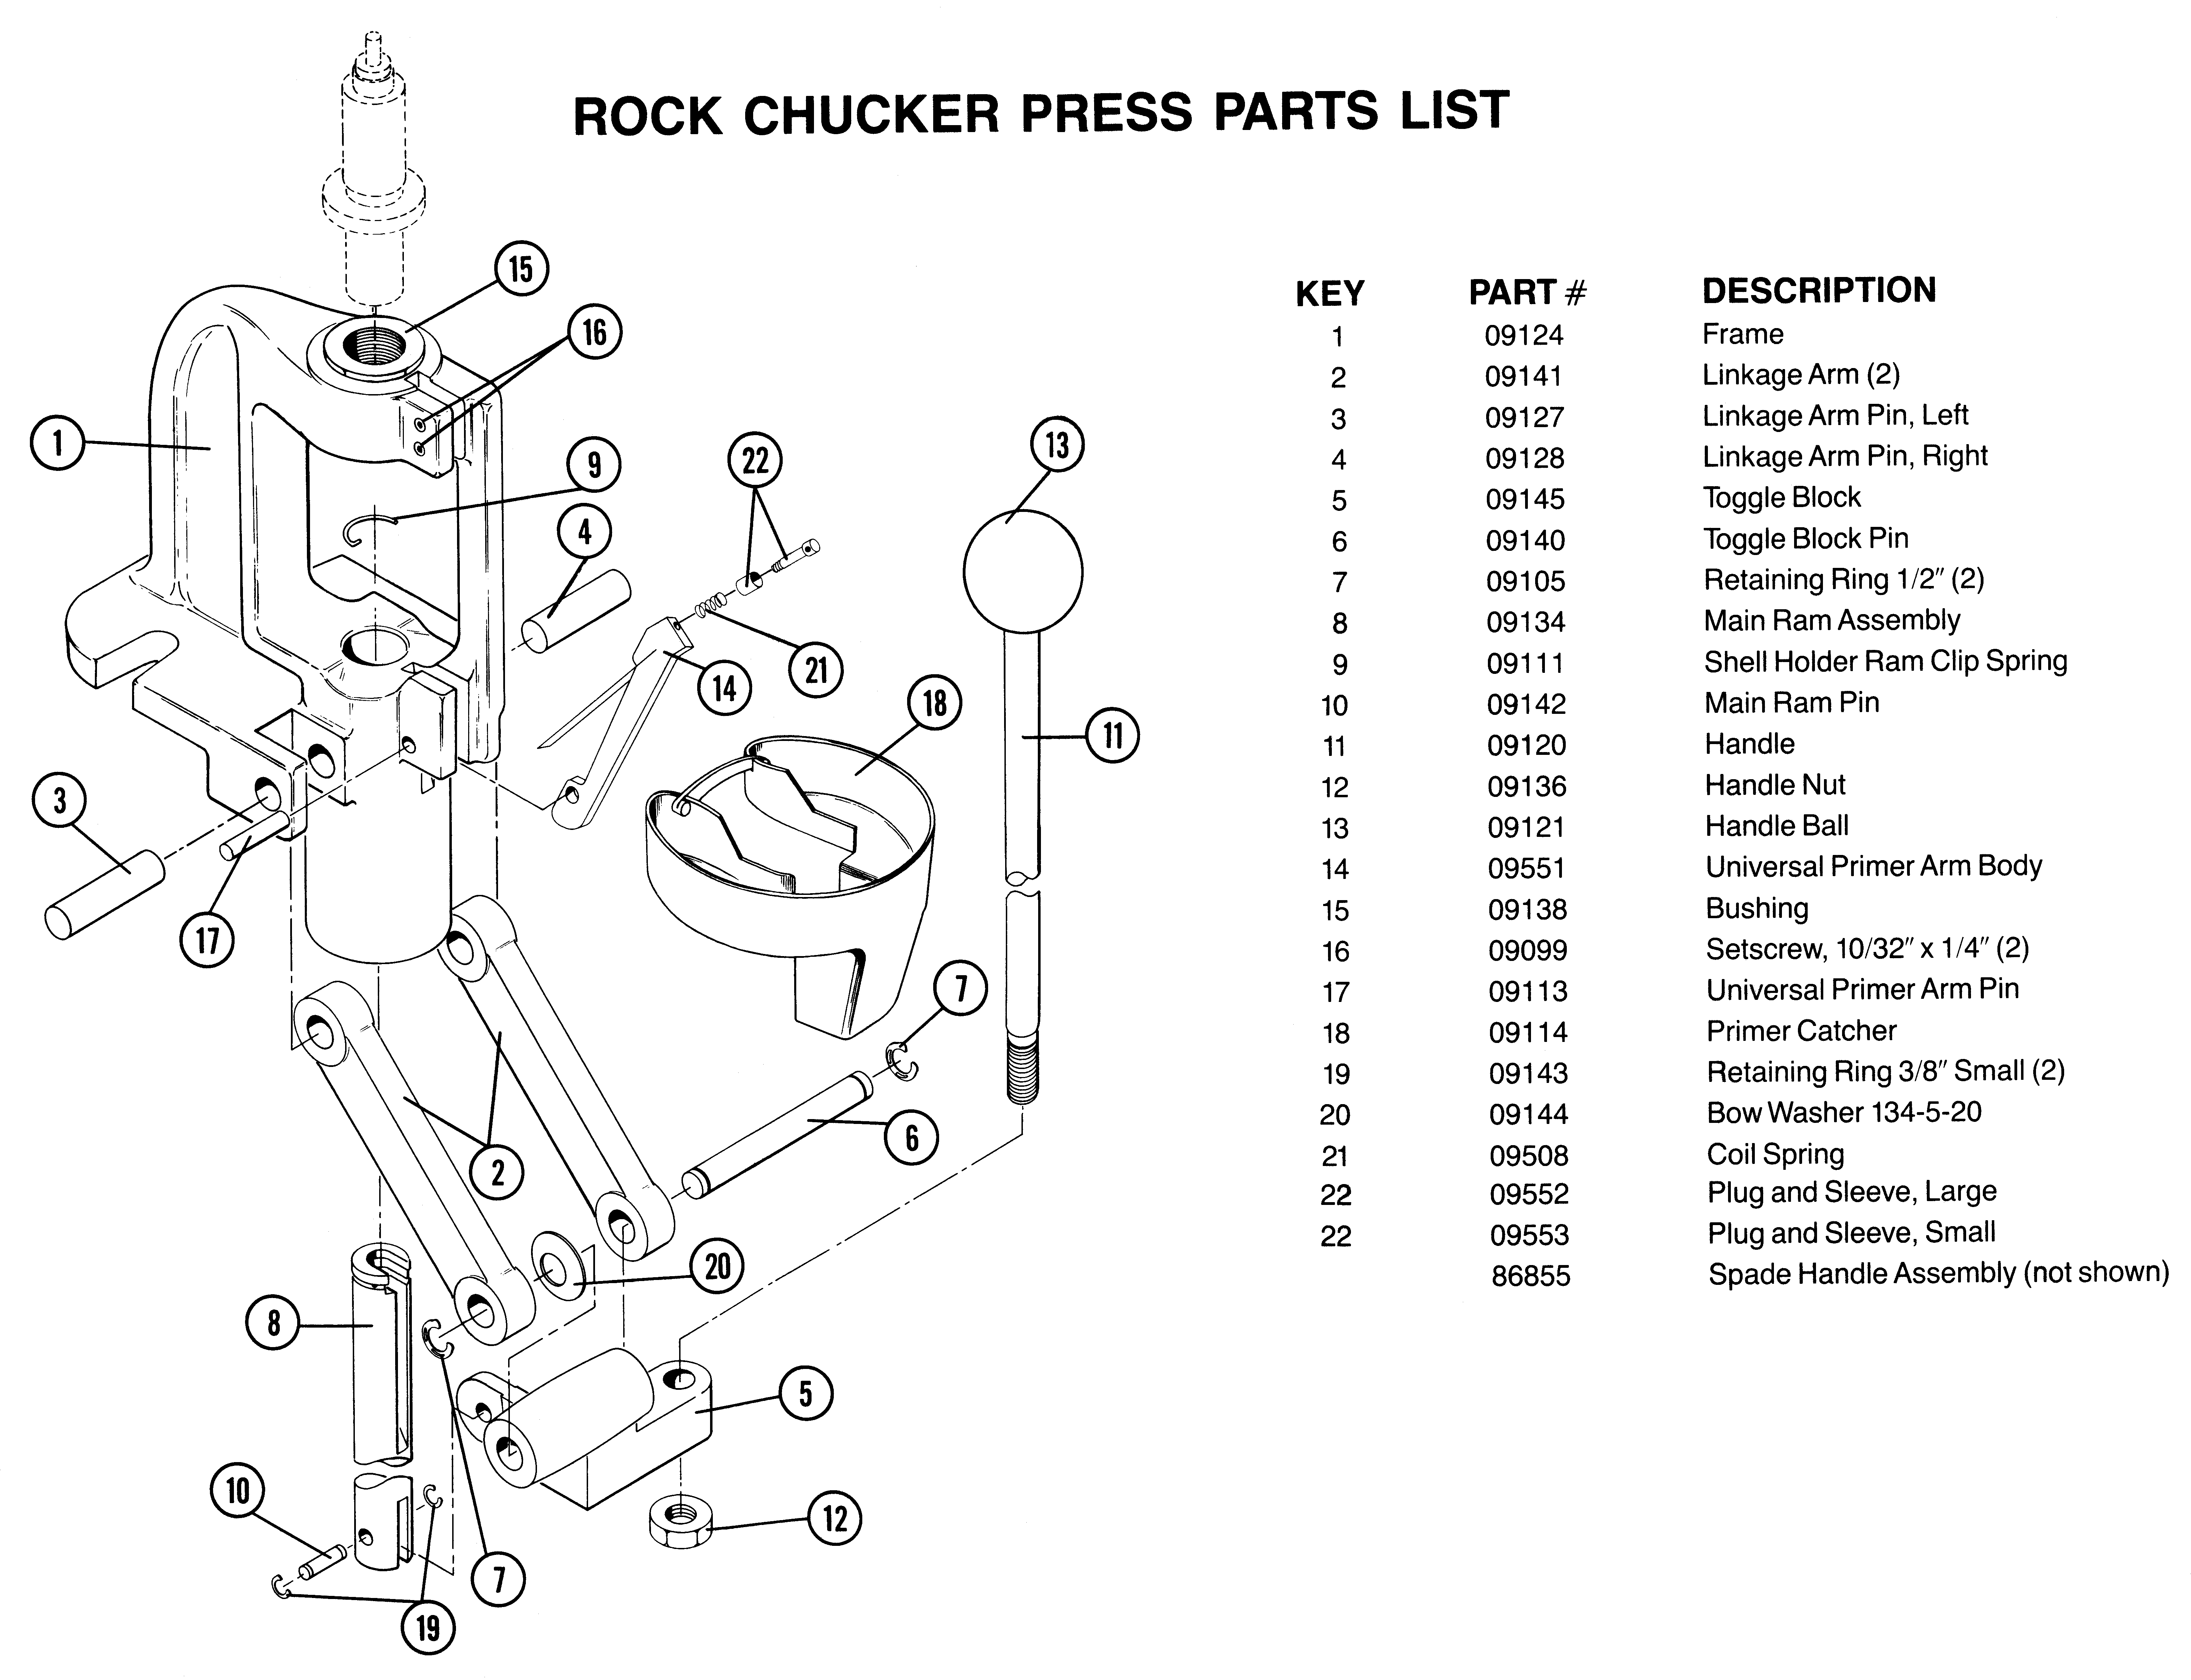
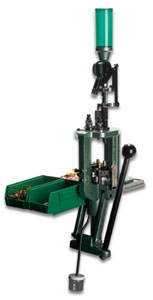
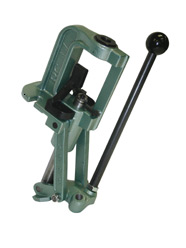
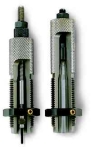
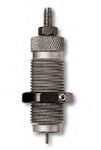
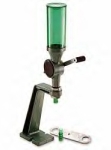
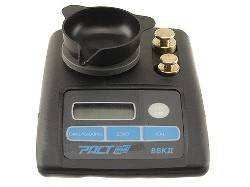
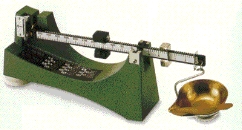


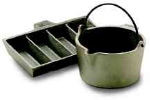
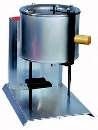
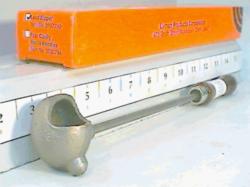
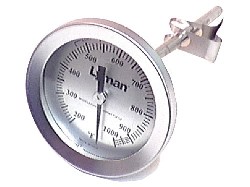
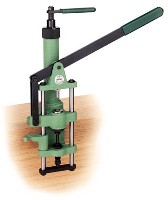
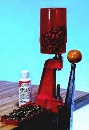
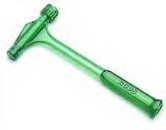
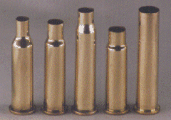
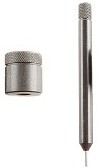
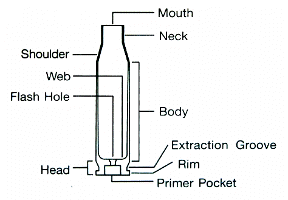 The areas of a bottlenecked cartridge (from the bullet end working towards the primer end) are: mouth, neck, shoulder, body, head (sometimes called base), extraction groove, and rim.
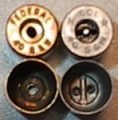 This photo shows two examples of 40S&W cases. The two cases on the left are Boxer-primed. Note the single concentric flash hole and the absence of an anvil. The Boxer anvil is an integral part of the primer -- not a part of the case. The two cases on the right are Berdan-primed. Note the concentric anvil located between two flash holes in the upper right. The Berdan primer has no integral anvil -- the Berdan anvil is an integral part of the case.